The most tedious part of collecting shift preferences is building the intake form all over again, every time.
Shiftaru connects to your Google account once and then auto-generates the Google Forms for you. The period, time slots, areas and courses you configured become the form's questions directly.
This guide walks through connect → generate → share → import, with real screenshots.
🎉 Now live
Shiftaru is officially live. The free practice mode (sample data) needs no signup. Google Form auto-generation unlocks after purchasing a license.
👉 https://shiftaru.com
The overall flow
Connect Google (first time only)
  → Configure the form content & preview it
  → Auto-generate the three forms
  → Share the response URLs with staff and customers
  → Publish the response sheet to the web
  → Paste the URL into the app and import
1. Connect your Google account
Open Settings → the "Form generation" tab and press ① "Connect".
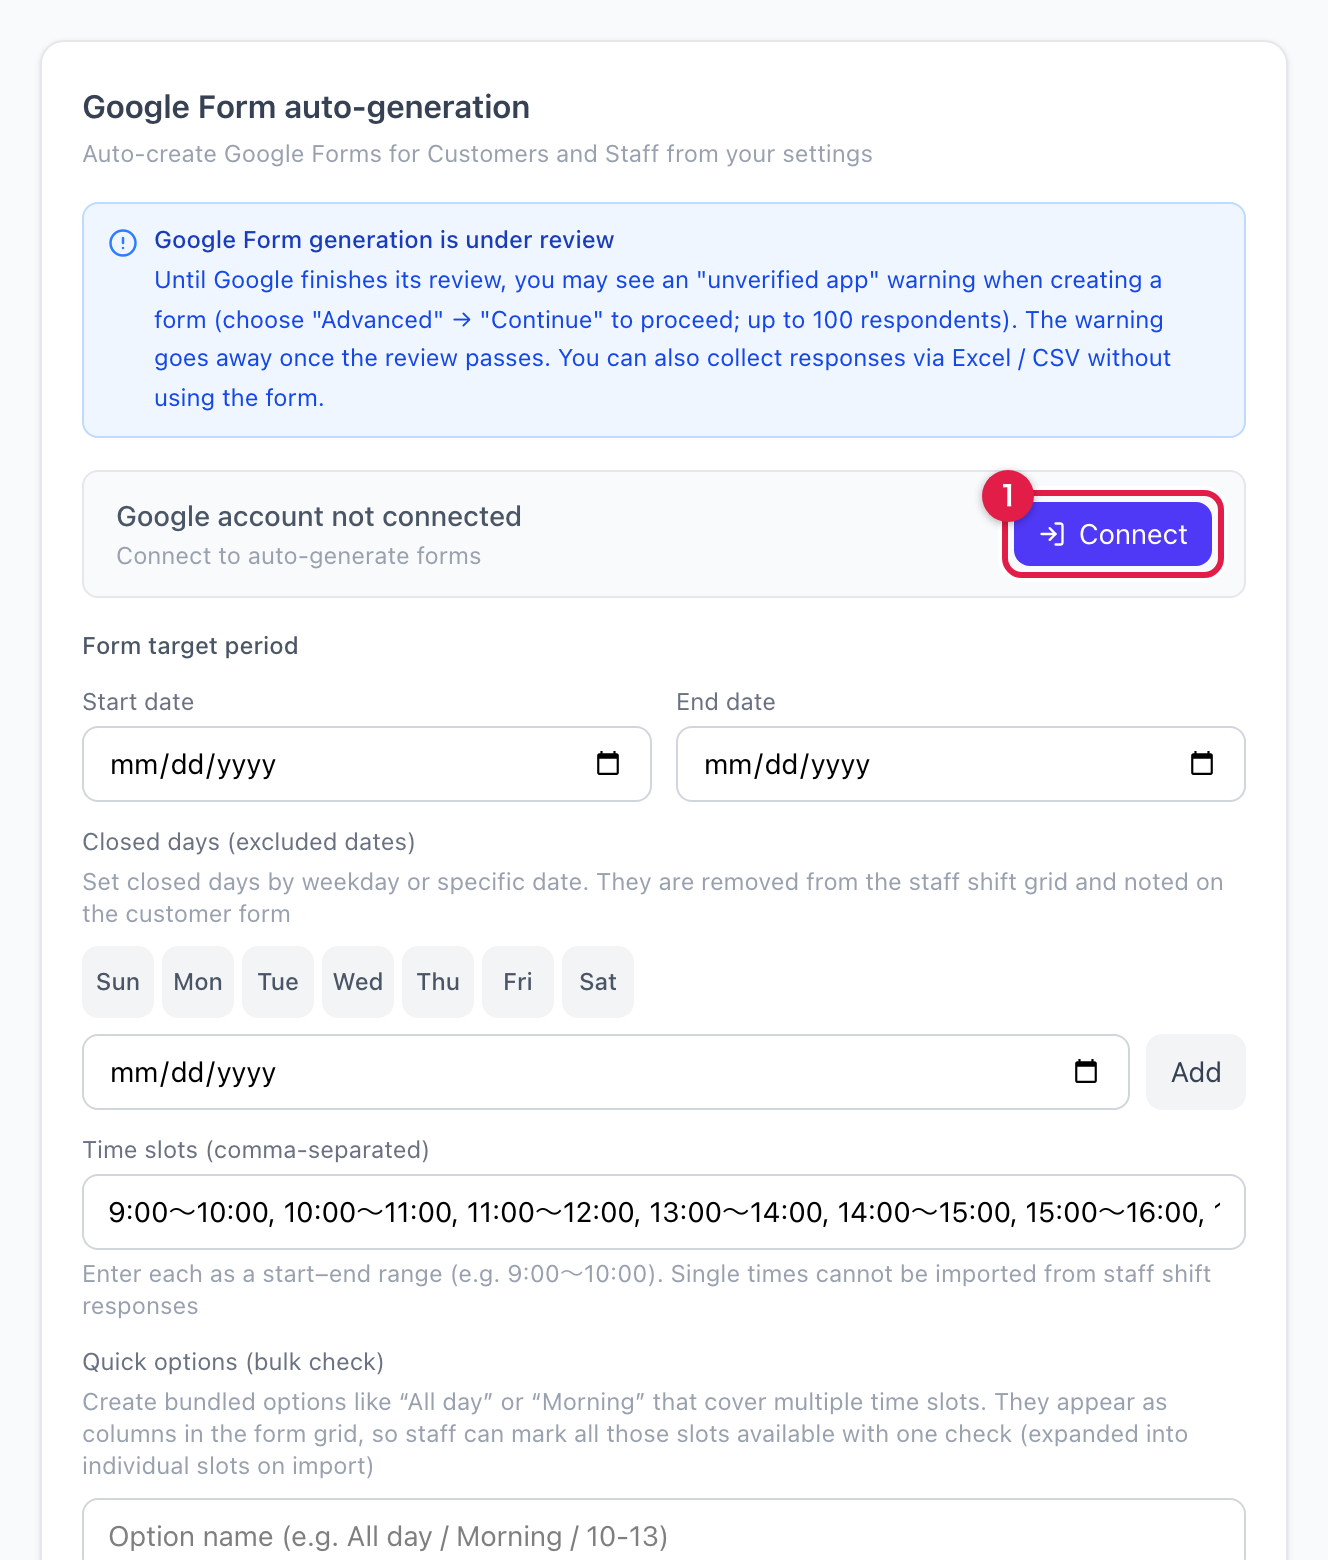
Google's sign-in screen opens. Sign in with the account you want the forms created under and grant access. Shiftaru has passed Google's review, so you connect with no warning and no respondent cap.
2. Confirm you're connected
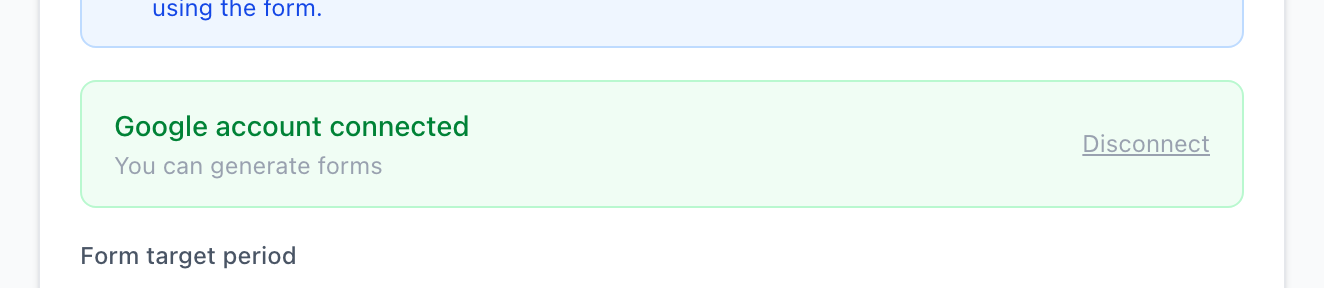
Once connected, you'll see the green "Google account connected" state. The "Google" chip at the bottom of the sidebar also flips to "Linked".
3. Configure the form content
In the same tab, set up what goes into the forms.
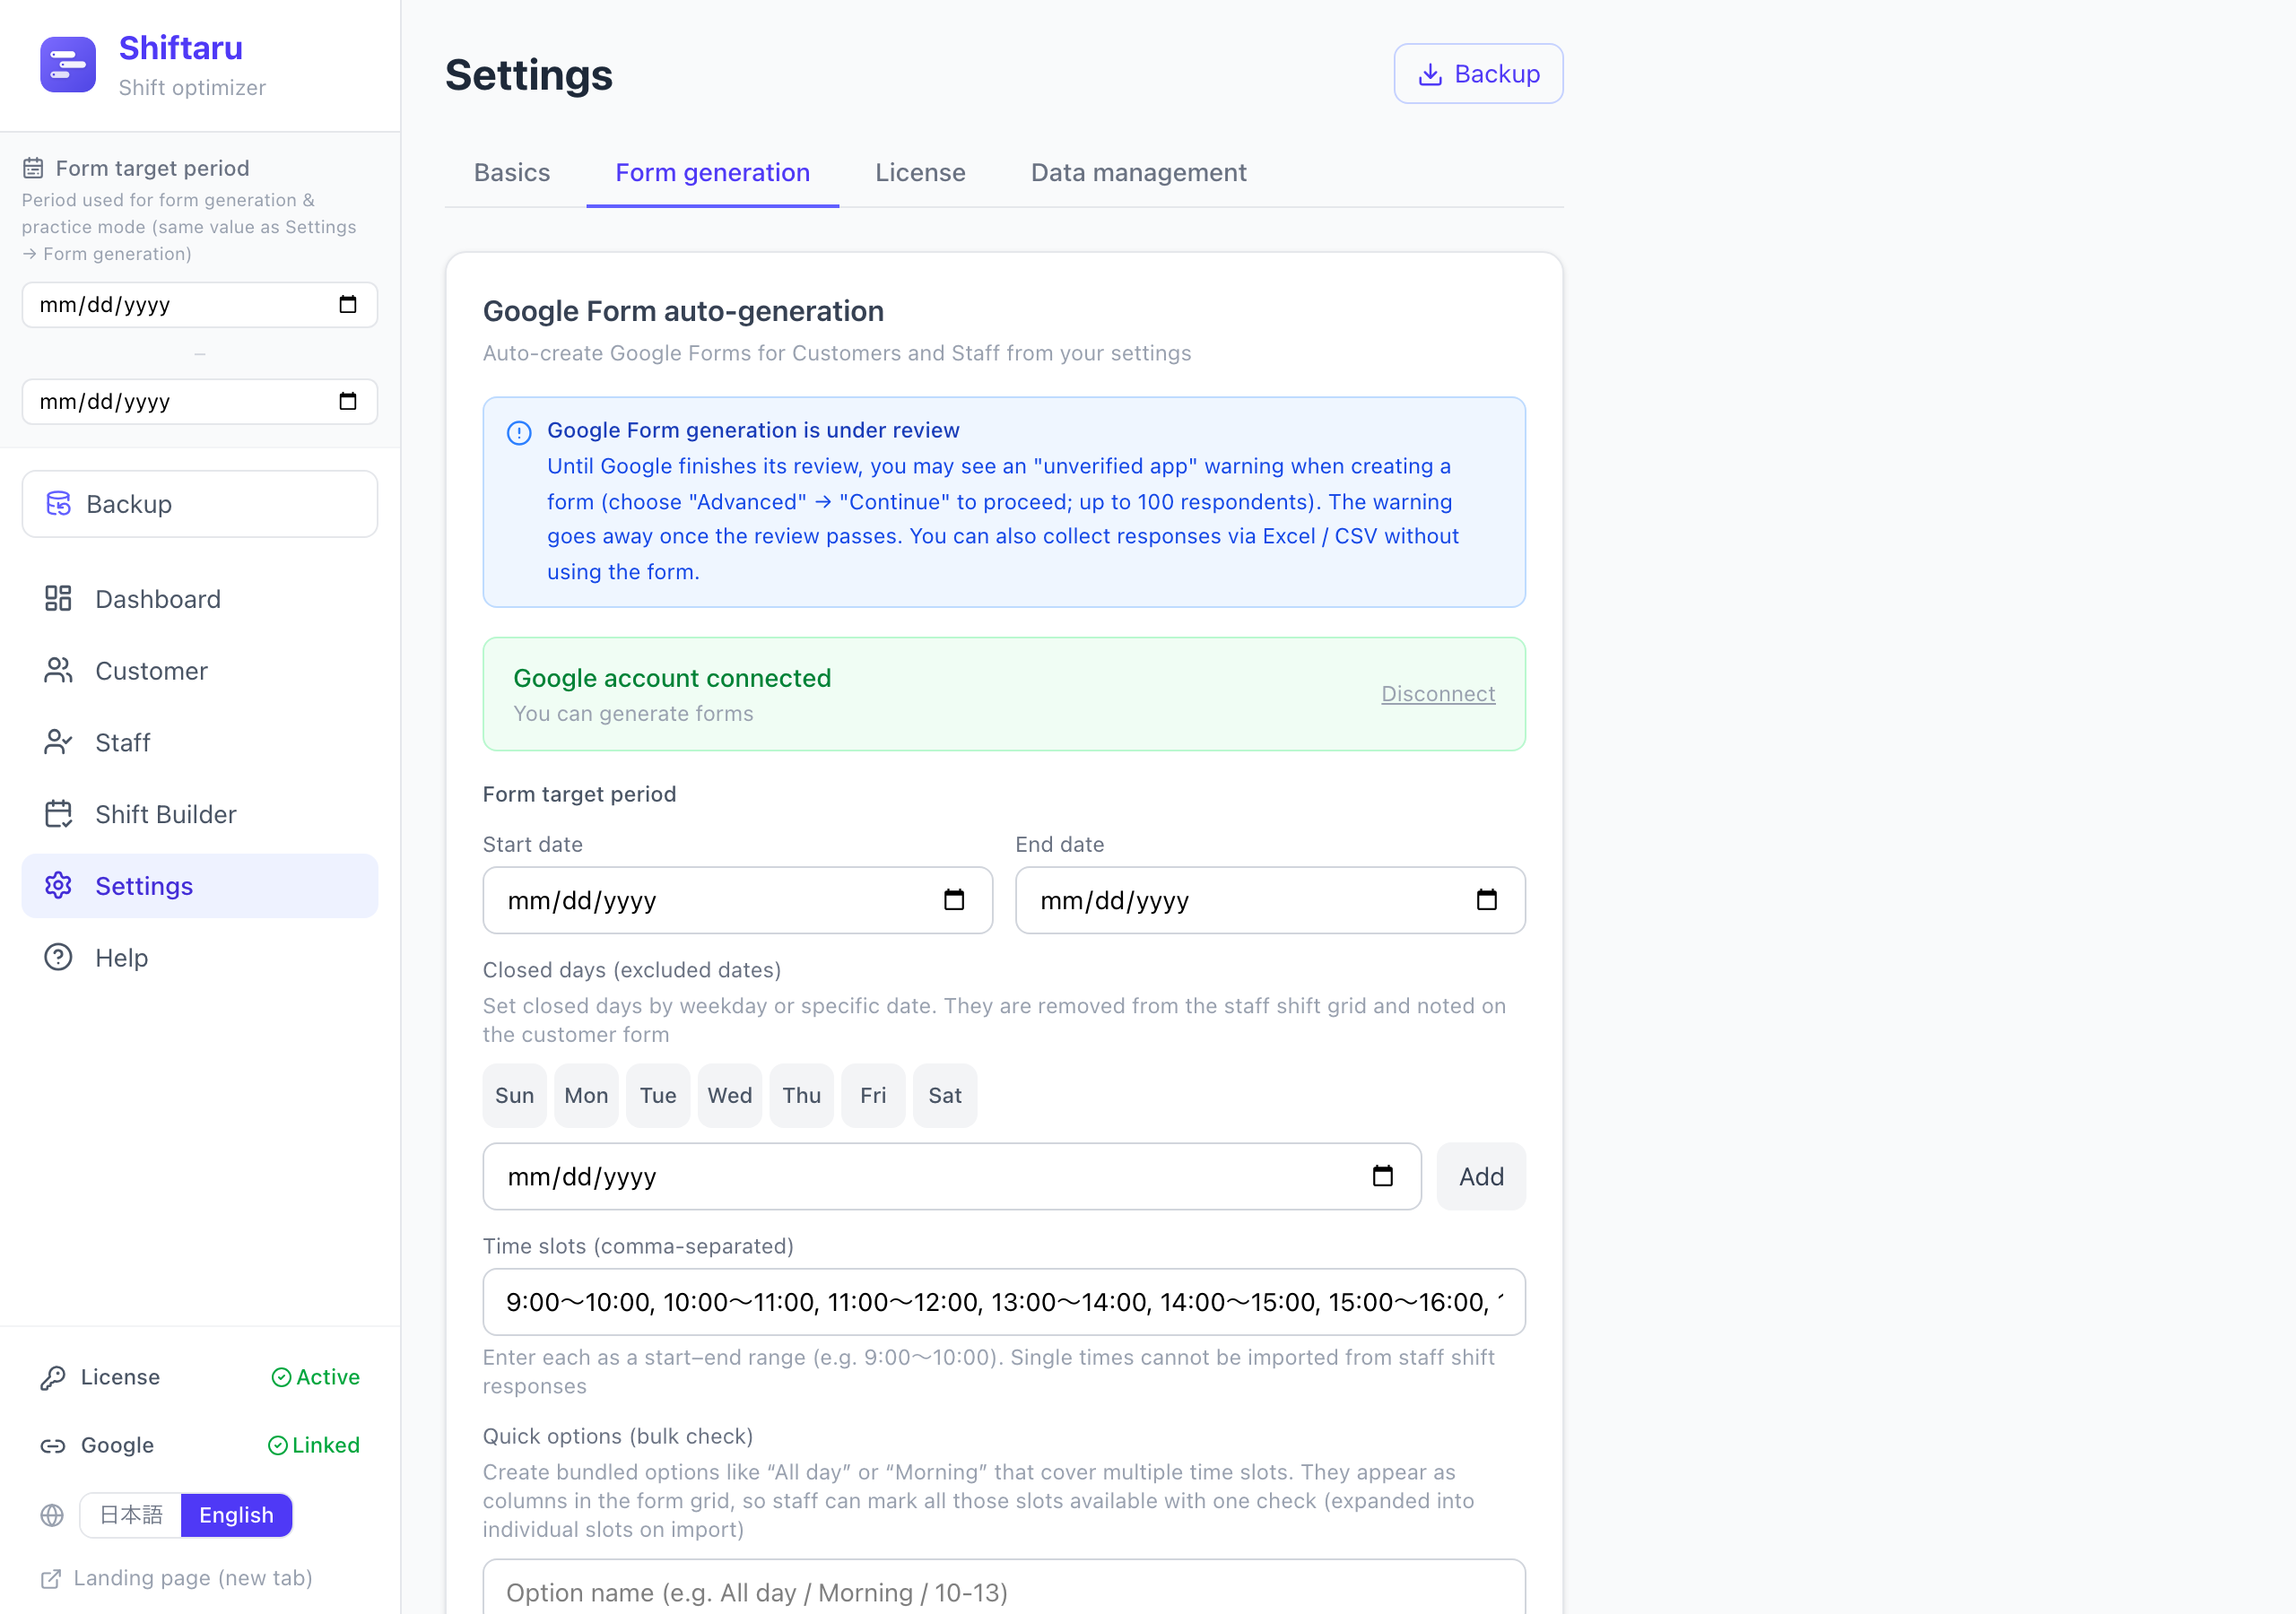
- Form target period — the period you're collecting for (these dates appear in the form)
- Closed days (excluded dates) — by weekday or by specific date. They are physically removed from the staff shift-preference grid
- Time slots (comma-separated) — the shift slots. Always enter them as a start–end range (like
9:00〜10:00). A single time cannot be imported from the responses - Quick options (bulk check) — build options like "All day" or "Morning" so staff can answer several time slots with one check (much less clicking for them)
Areas, courses, certifications and so on are pulled automatically from what you registered in the "Basics" tab.
4. Check it in the form preview
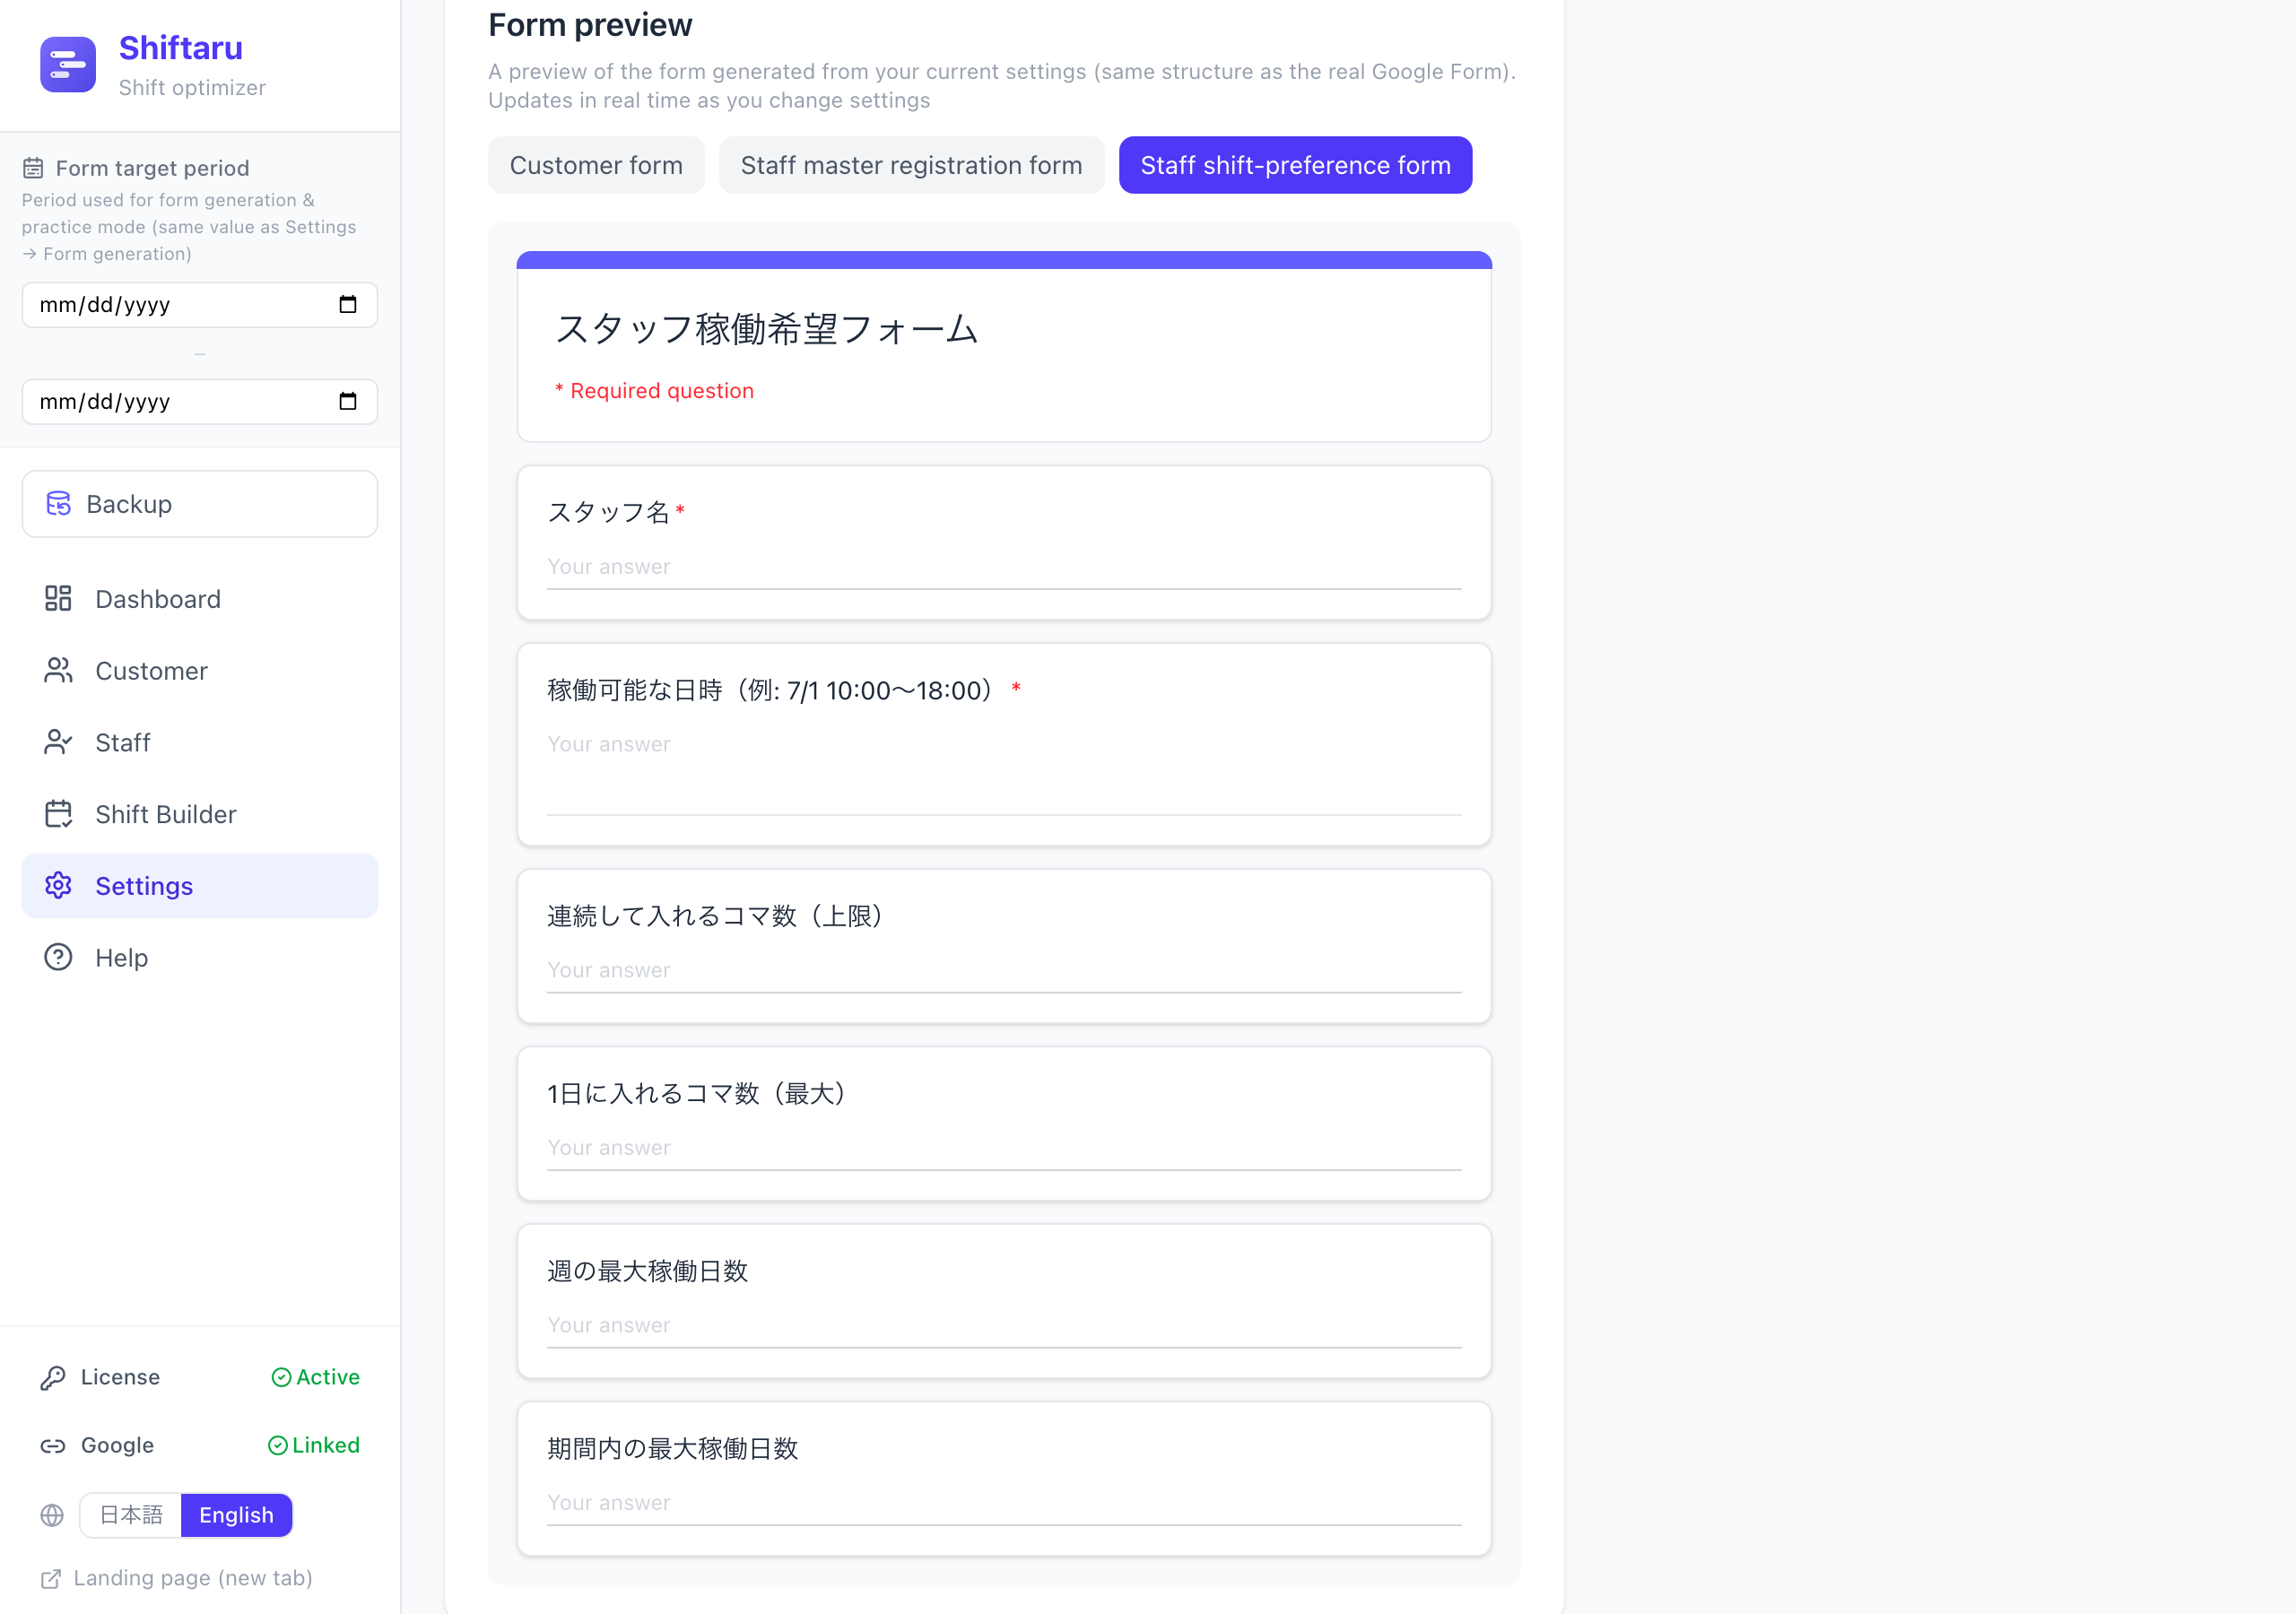
Before generating, use the "Form preview" at the bottom of the screen to see the finished form. It has the same structure as the real Google Form and updates in real time as you change settings.
5. Generate the forms
When you're ready, press the generate buttons. There are three forms.
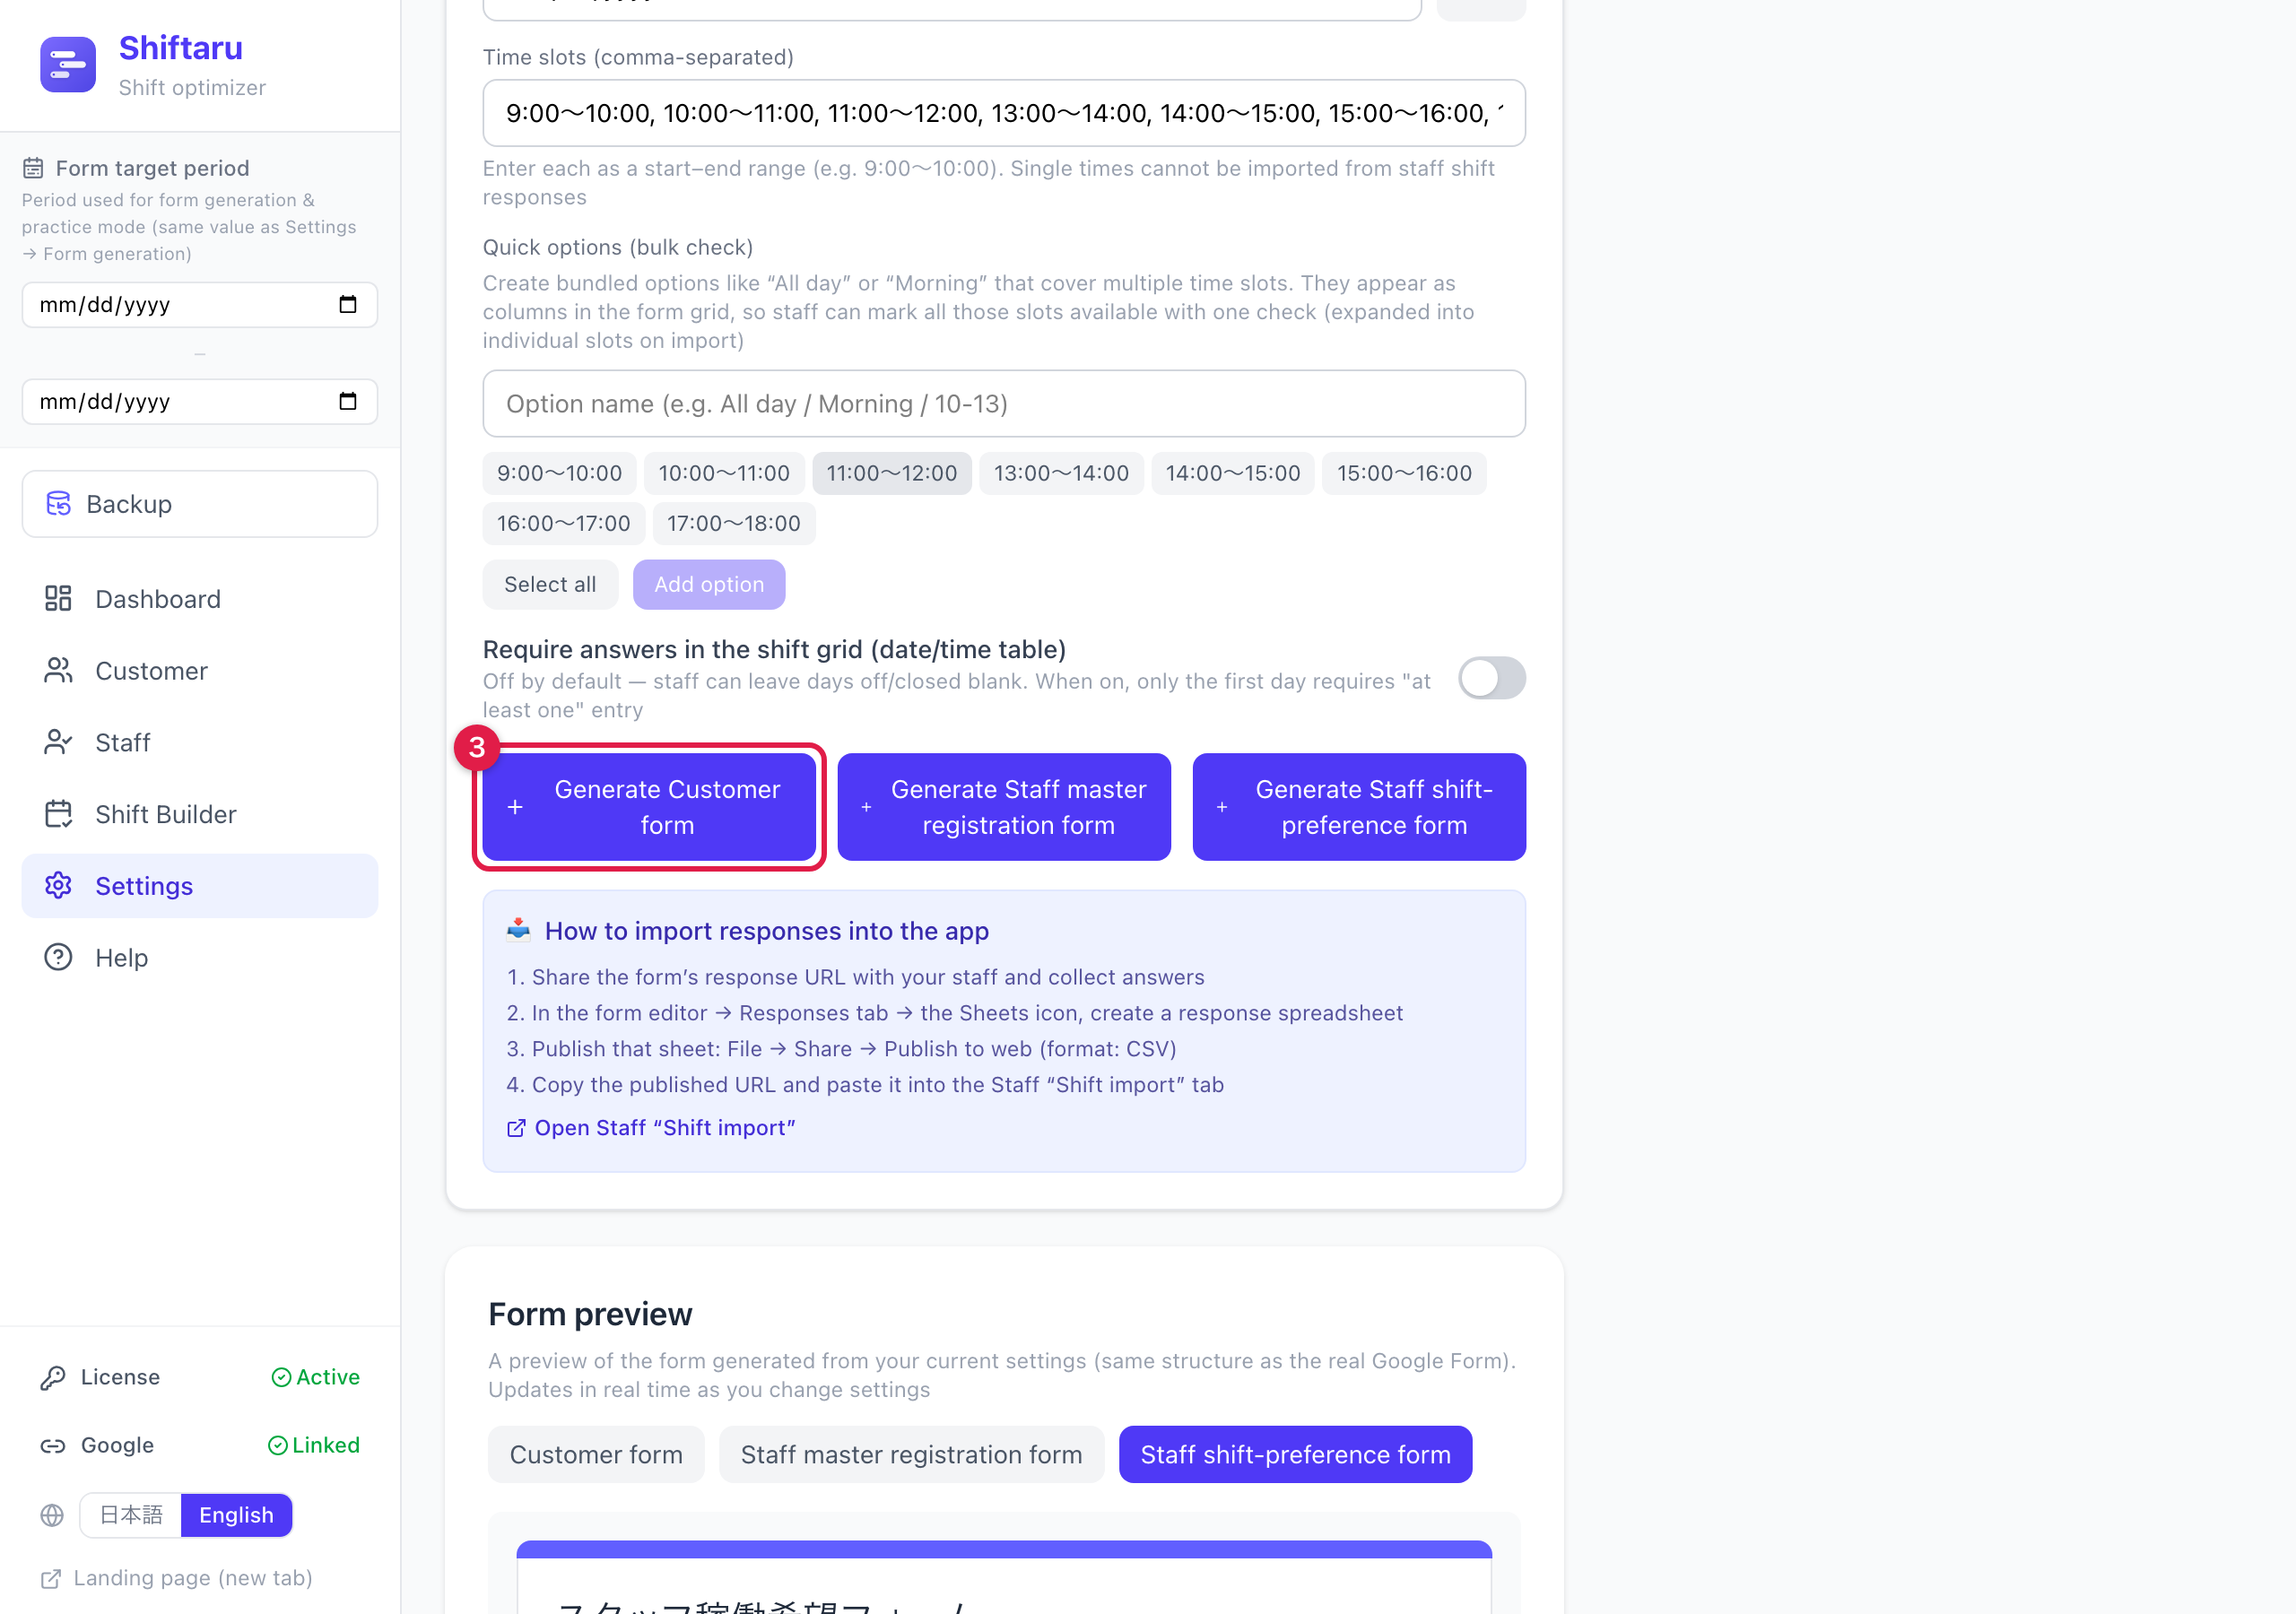
| Form | What it collects | How often |
|---|---|---|
| Customer form | Preferred dates/times, course, area, etc. | Every period |
| Staff master registration form | Name, covered areas, certifications, etc. | Once |
| Staff shift-preference form | Available dates/times (a check grid) | Every week/month |
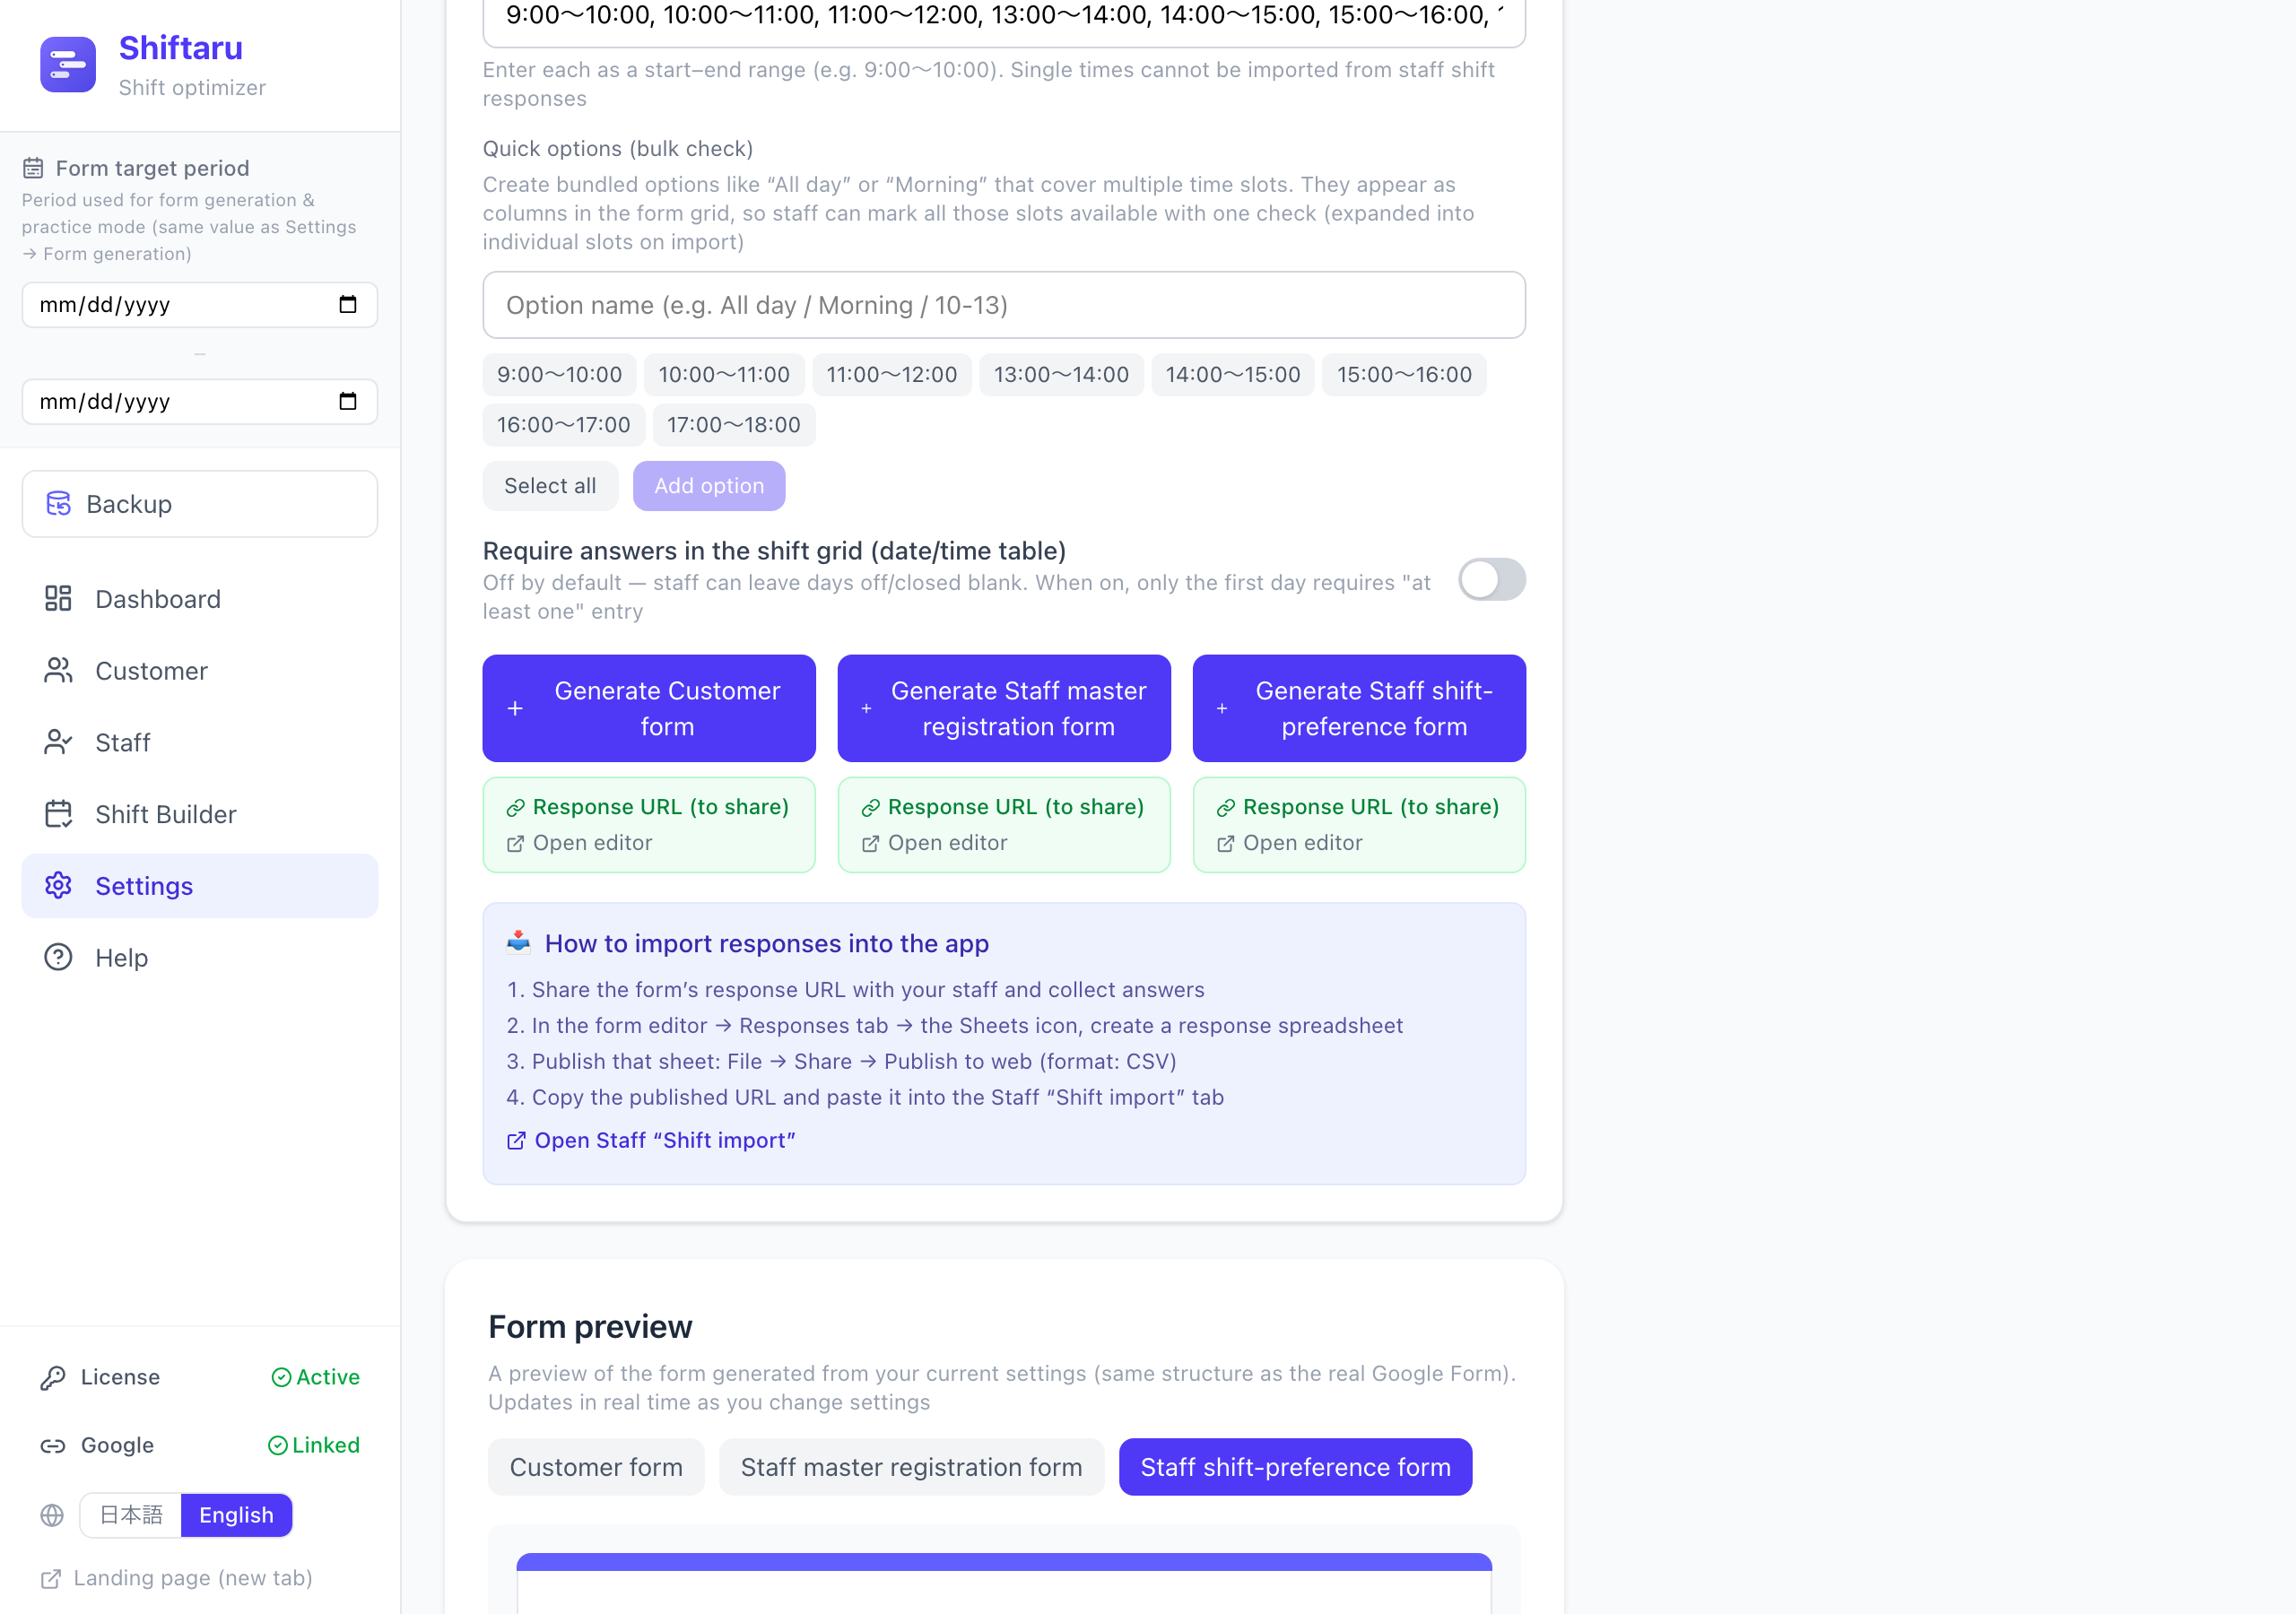
6. Share the response URLs
After generating, each form shows a "Response URL (to share)" and an "Open editor" link.
Just send the response URL to your staff and customers by email or chat.
💡 If the same person answers again, the latest response overwrites the previous one (matched by email address).
7. Publish the response sheet to the web (on Google's side)
Once responses come in, publish the sheet in a form the app can read. This is the one step you do on Google's side.
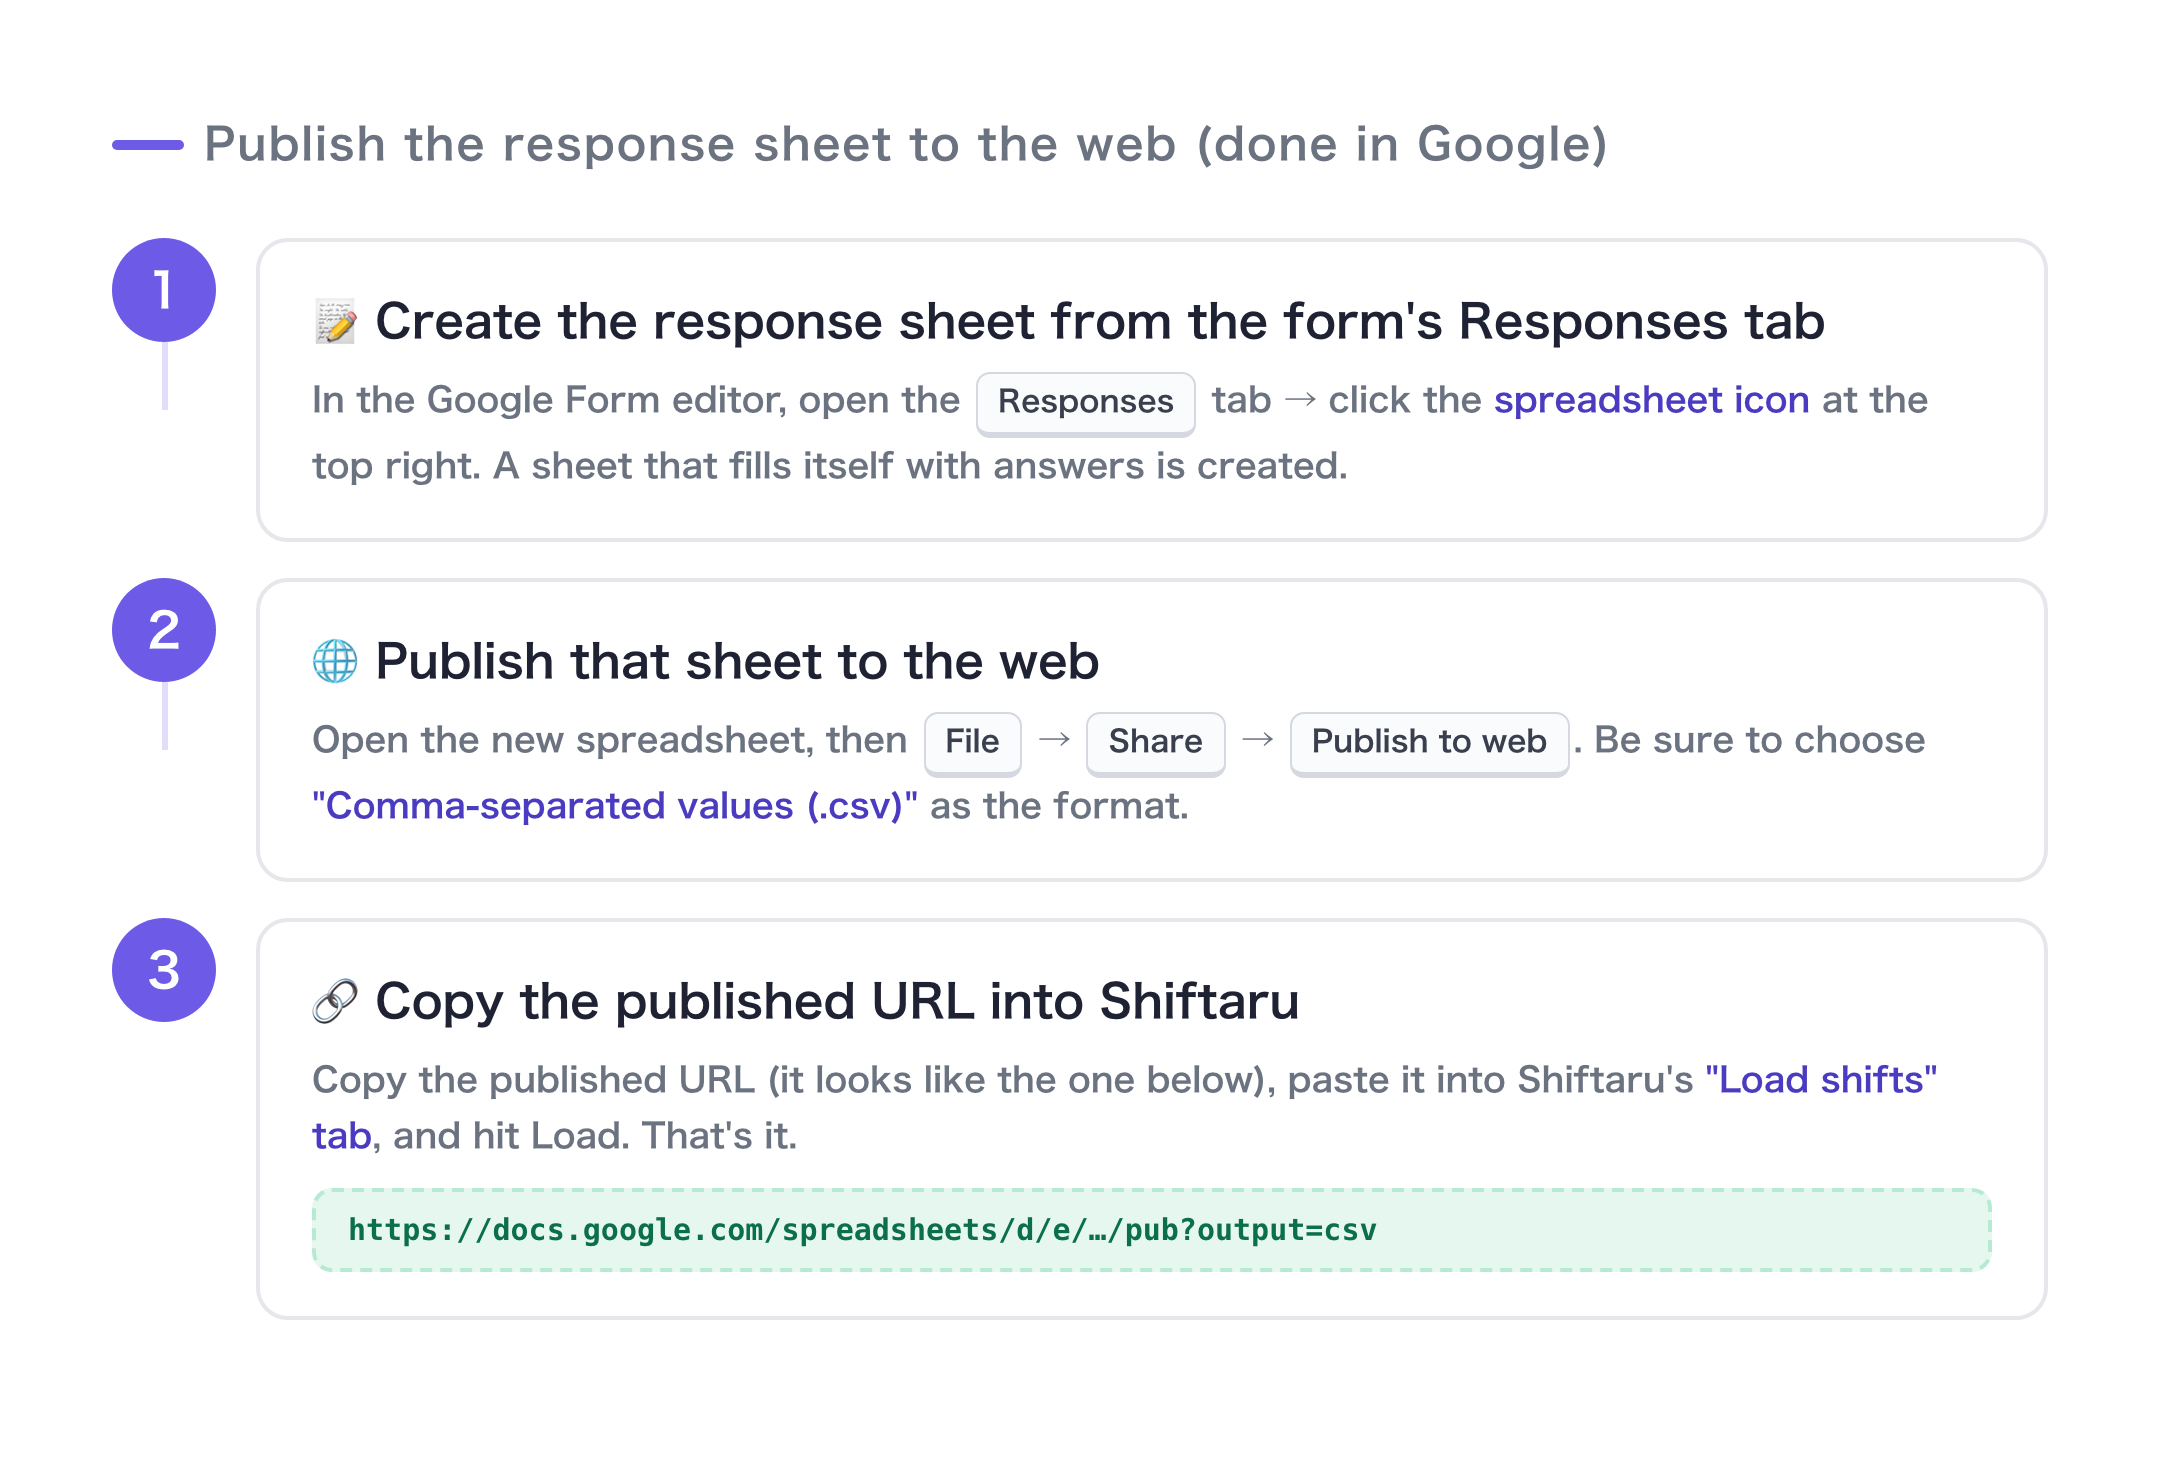
- In the form editor, open the "Responses" tab → click the Sheets icon to create a response spreadsheet
- In that sheet, go to File → Share → Publish to web, and be sure to choose the comma-separated values (.csv) format
- Copy the published URL (
…/pub?output=csv)
🔒 "Publish to web" means anyone with the URL can view it. If that bothers you, you can skip publishing entirely and instead download the CSV and drop it into the app.
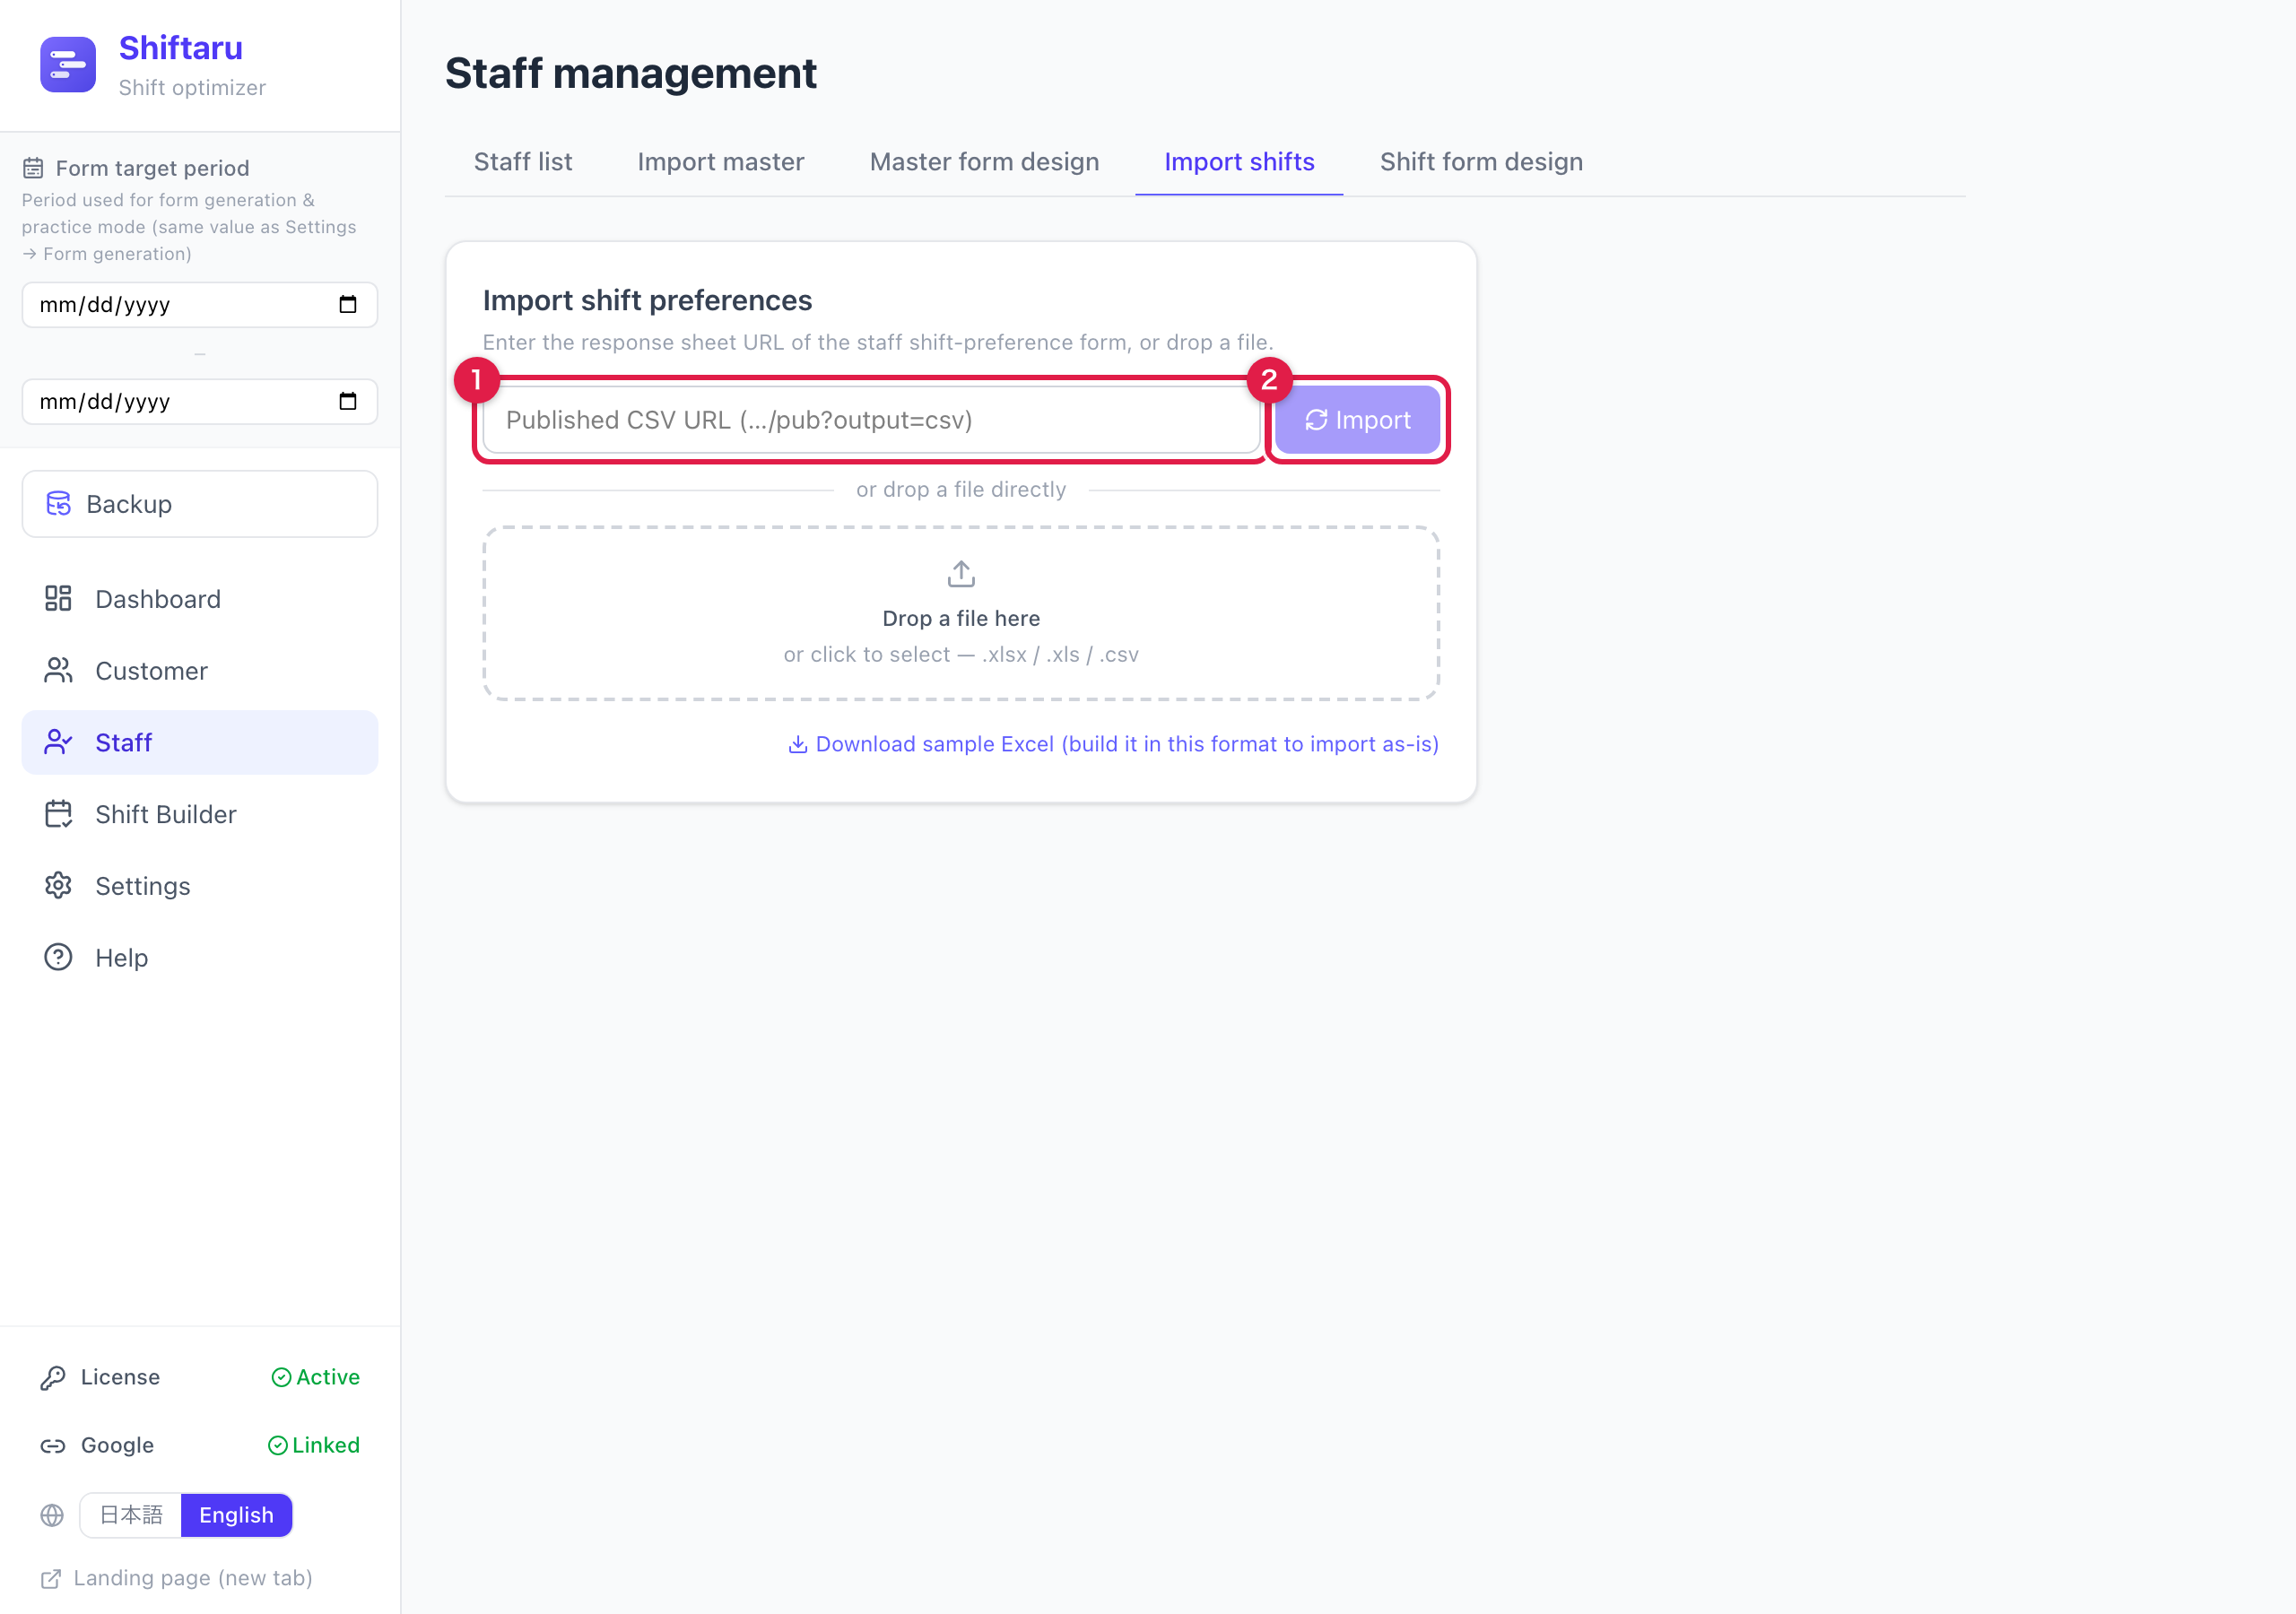
8. Paste it into the shift import tab
Back in Shiftaru, go to Staff → the "Import shifts" tab. Paste the published URL into ① and press ② "Import". Done.
- Staff master responses go into the "Import master" tab
- Customer responses go into the "Import Customers" tab, exactly the same way
- The URL is saved, so from the second time on you just re-import
From here it's the same as the free trial guide: press "Run matching" and the shifts build themselves.
Summary
- Settings → Form generation and connect Google (first time only)
- Set the period, closed days and time slots, then check the preview
- Auto-generate the three forms and share the response URLs
- Publish the response sheet to the web (CSV)
- Paste the published URL into the import tab — that's it
No more hand-building forms. No more retyping responses.
- ▶ https://shiftaru.com — free practice mode, no signup
- ▶ Read more: Shiftaru Blog