Shiftaru is a shift & booking auto-matching web app. No signup, no install.
Open your browser and you can go through a full matching round in about five minutes.
This article is the step-by-step guide to that free practice mode, with real screenshots so you never get lost.
🎉 Now live
Shiftaru is officially live. The free practice mode (sample data) needs no signup.
👉 https://shiftaru.com
The video version of this guide. If watching is faster for you, start here.
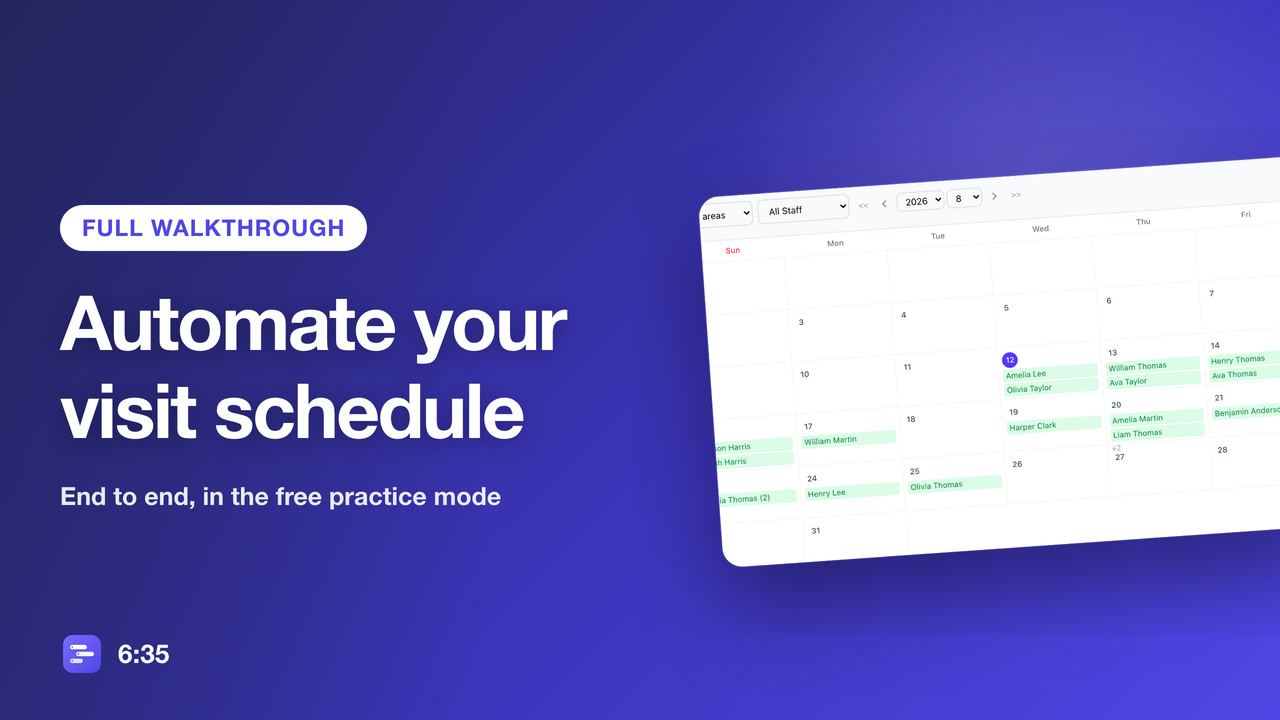
▶ Watch the full walkthrough (6:35)
1. Pick your industry
Open shiftaru.com and click the free-trial button. The first thing you're asked is what industry this is for. Pick whatever is closest to your situation.
You can change it later in Settings at any time, so don't overthink it here.
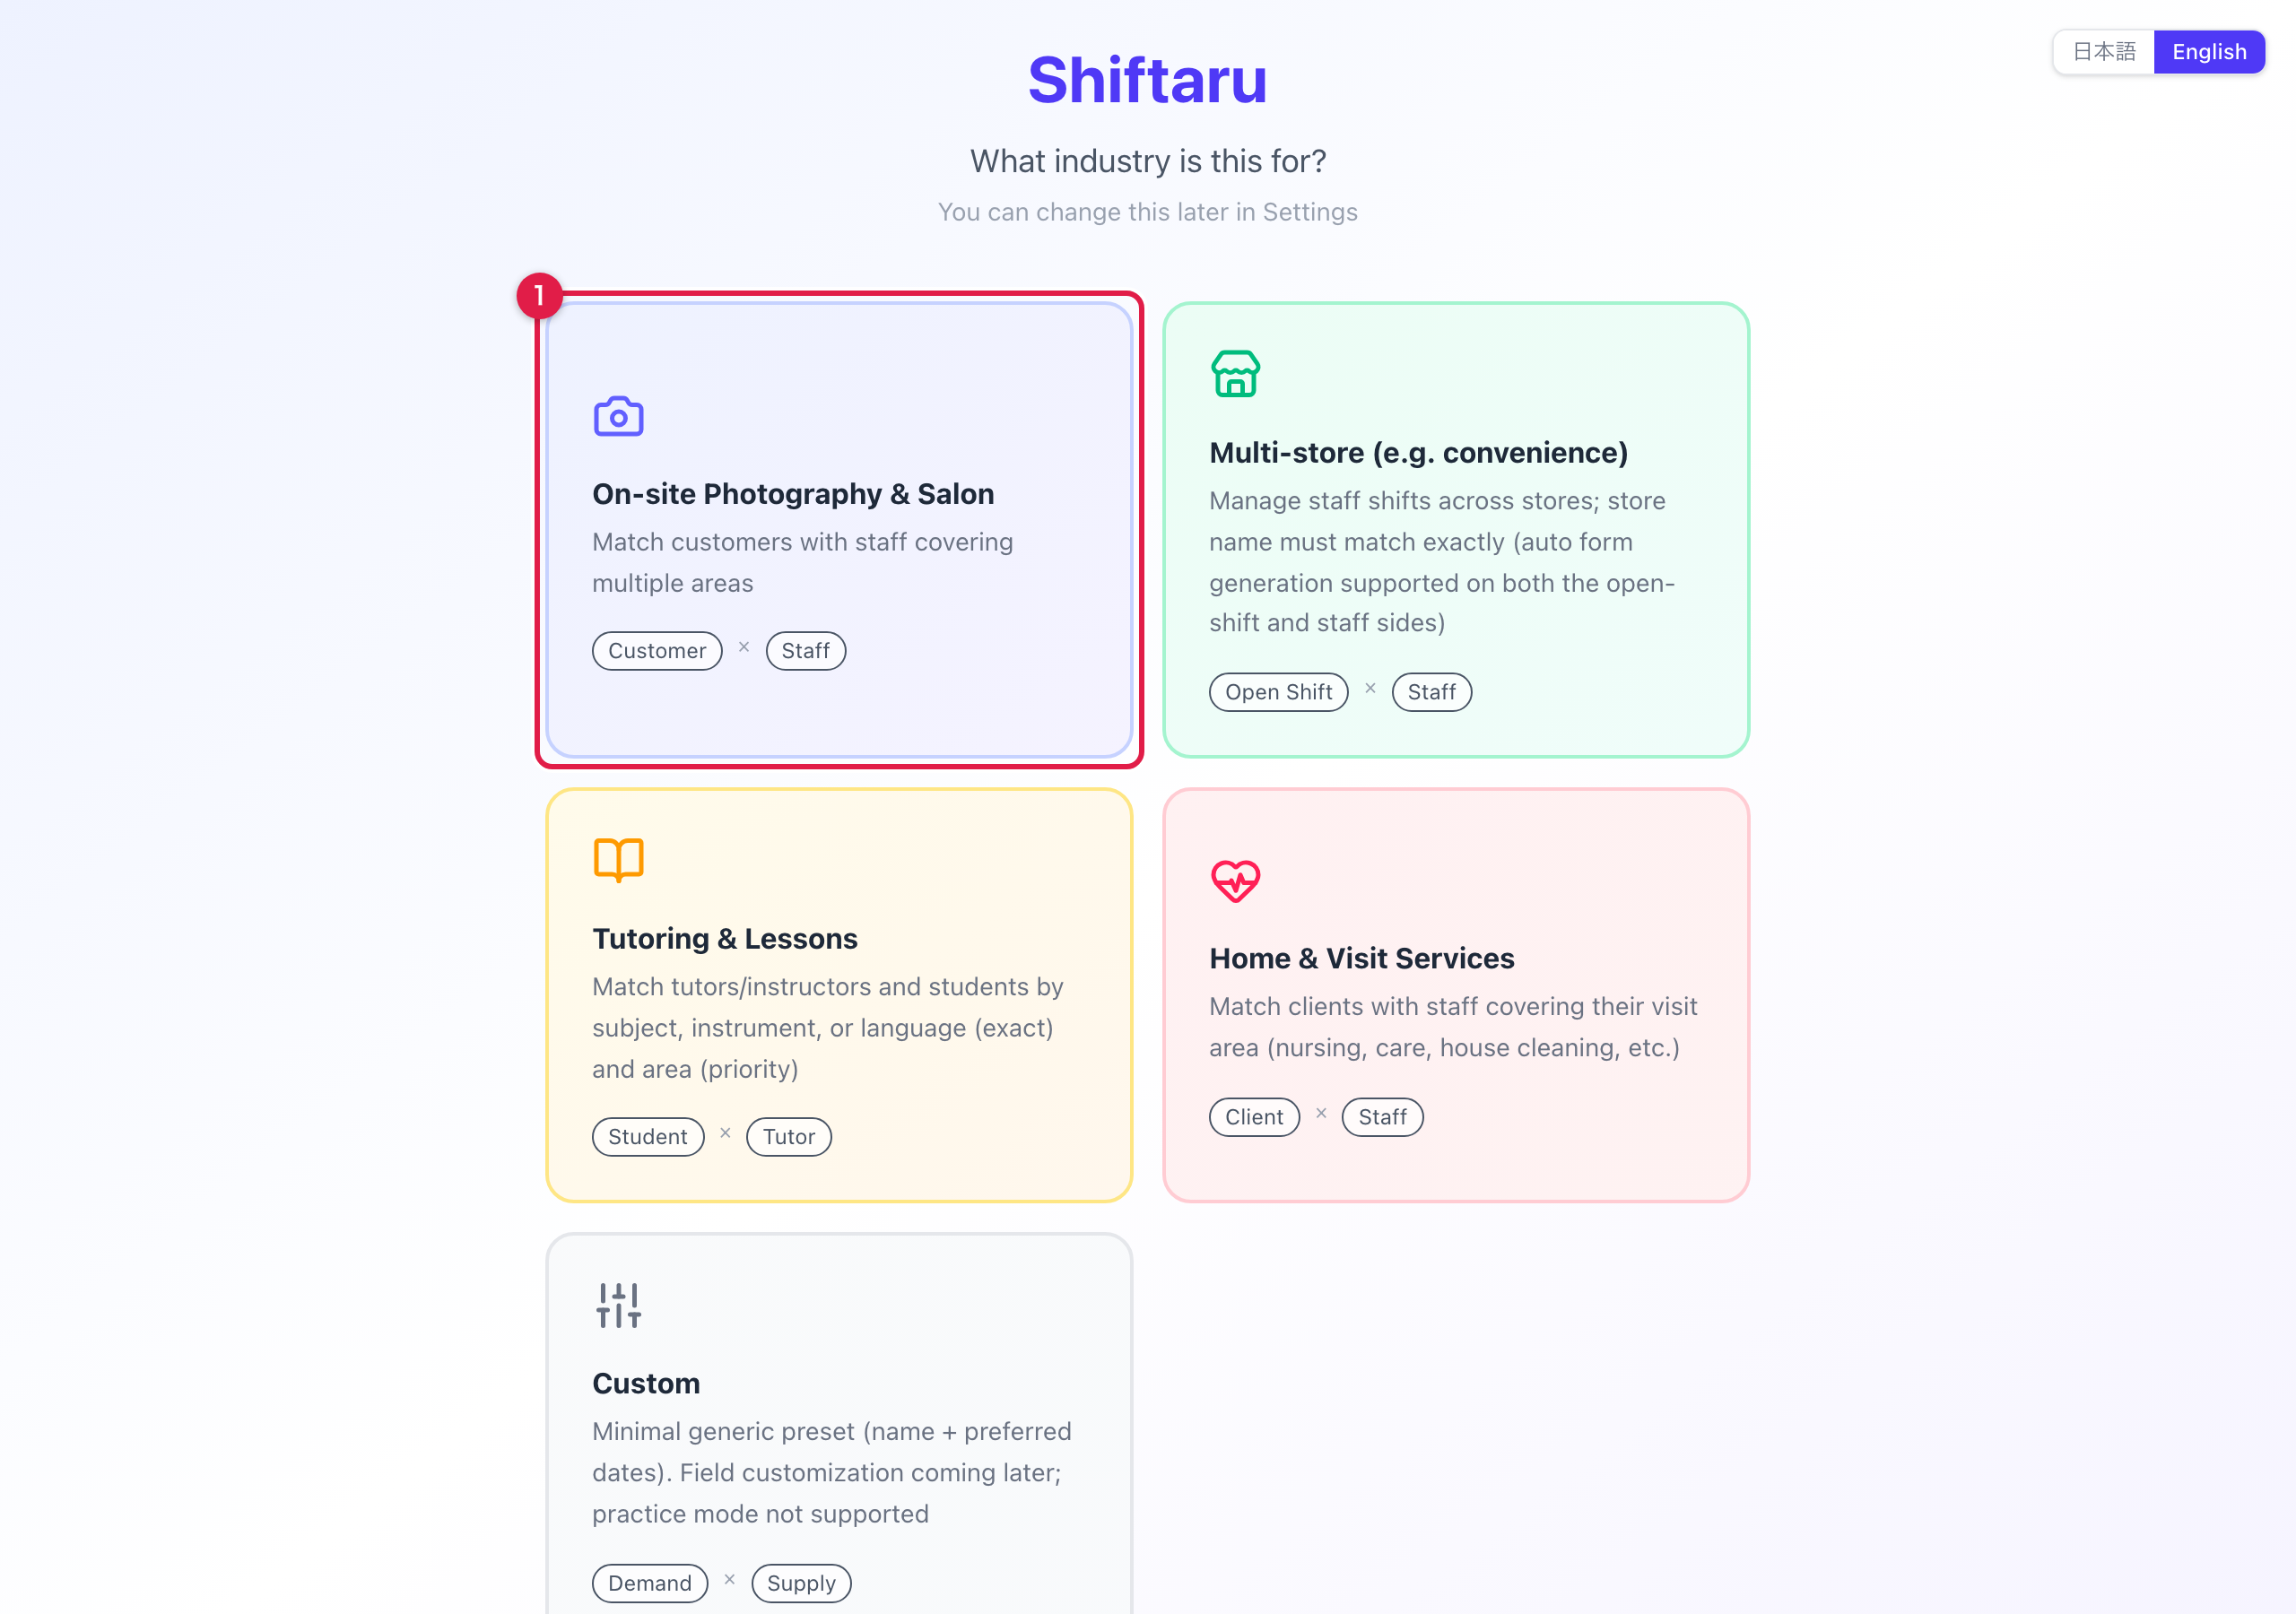
- On-site Photography & Salon — match customers with staff covering multiple areas
- Multi-store (e.g. convenience) — fill open shifts by required headcount
- Tutoring & Lessons — connect students and tutors by subject and level
- Home & Visit Services — area × certification × client (nursing, care, cleaning)
Once you choose, the wording (Customer / Student / Client…) and the settings switch to match your industry.
2. Load samples in practice mode
On the Dashboard you'll find the "Practice mode (try with samples)" card.
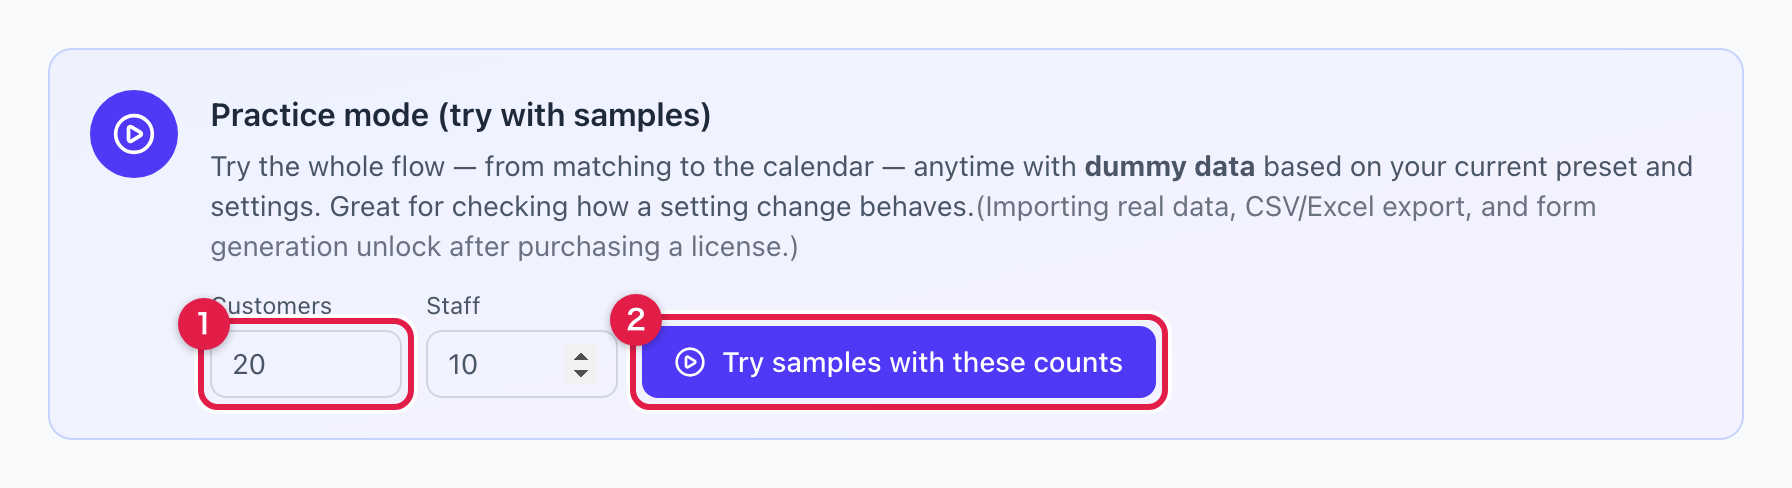
① Set the counts. The default is 20 customers × 10 staff. Change it to something close to your real operation — even 500 × 50 works.
② Press "Try samples with these counts". Fictional customer and staff data is loaded and you're taken straight to the Shift Builder screen.
💡 The samples are fictional data. Load them, clear them, reload them as often as you like — your real data is never affected.
3. Run matching
On the Shift Builder screen, if you see "Customers 20 / Staff 10 / Ready", you're good to go.
You can also adjust the break time and the assignment strategy (spread / concentrate) here, but for a first pass just press ③ "Run matching".
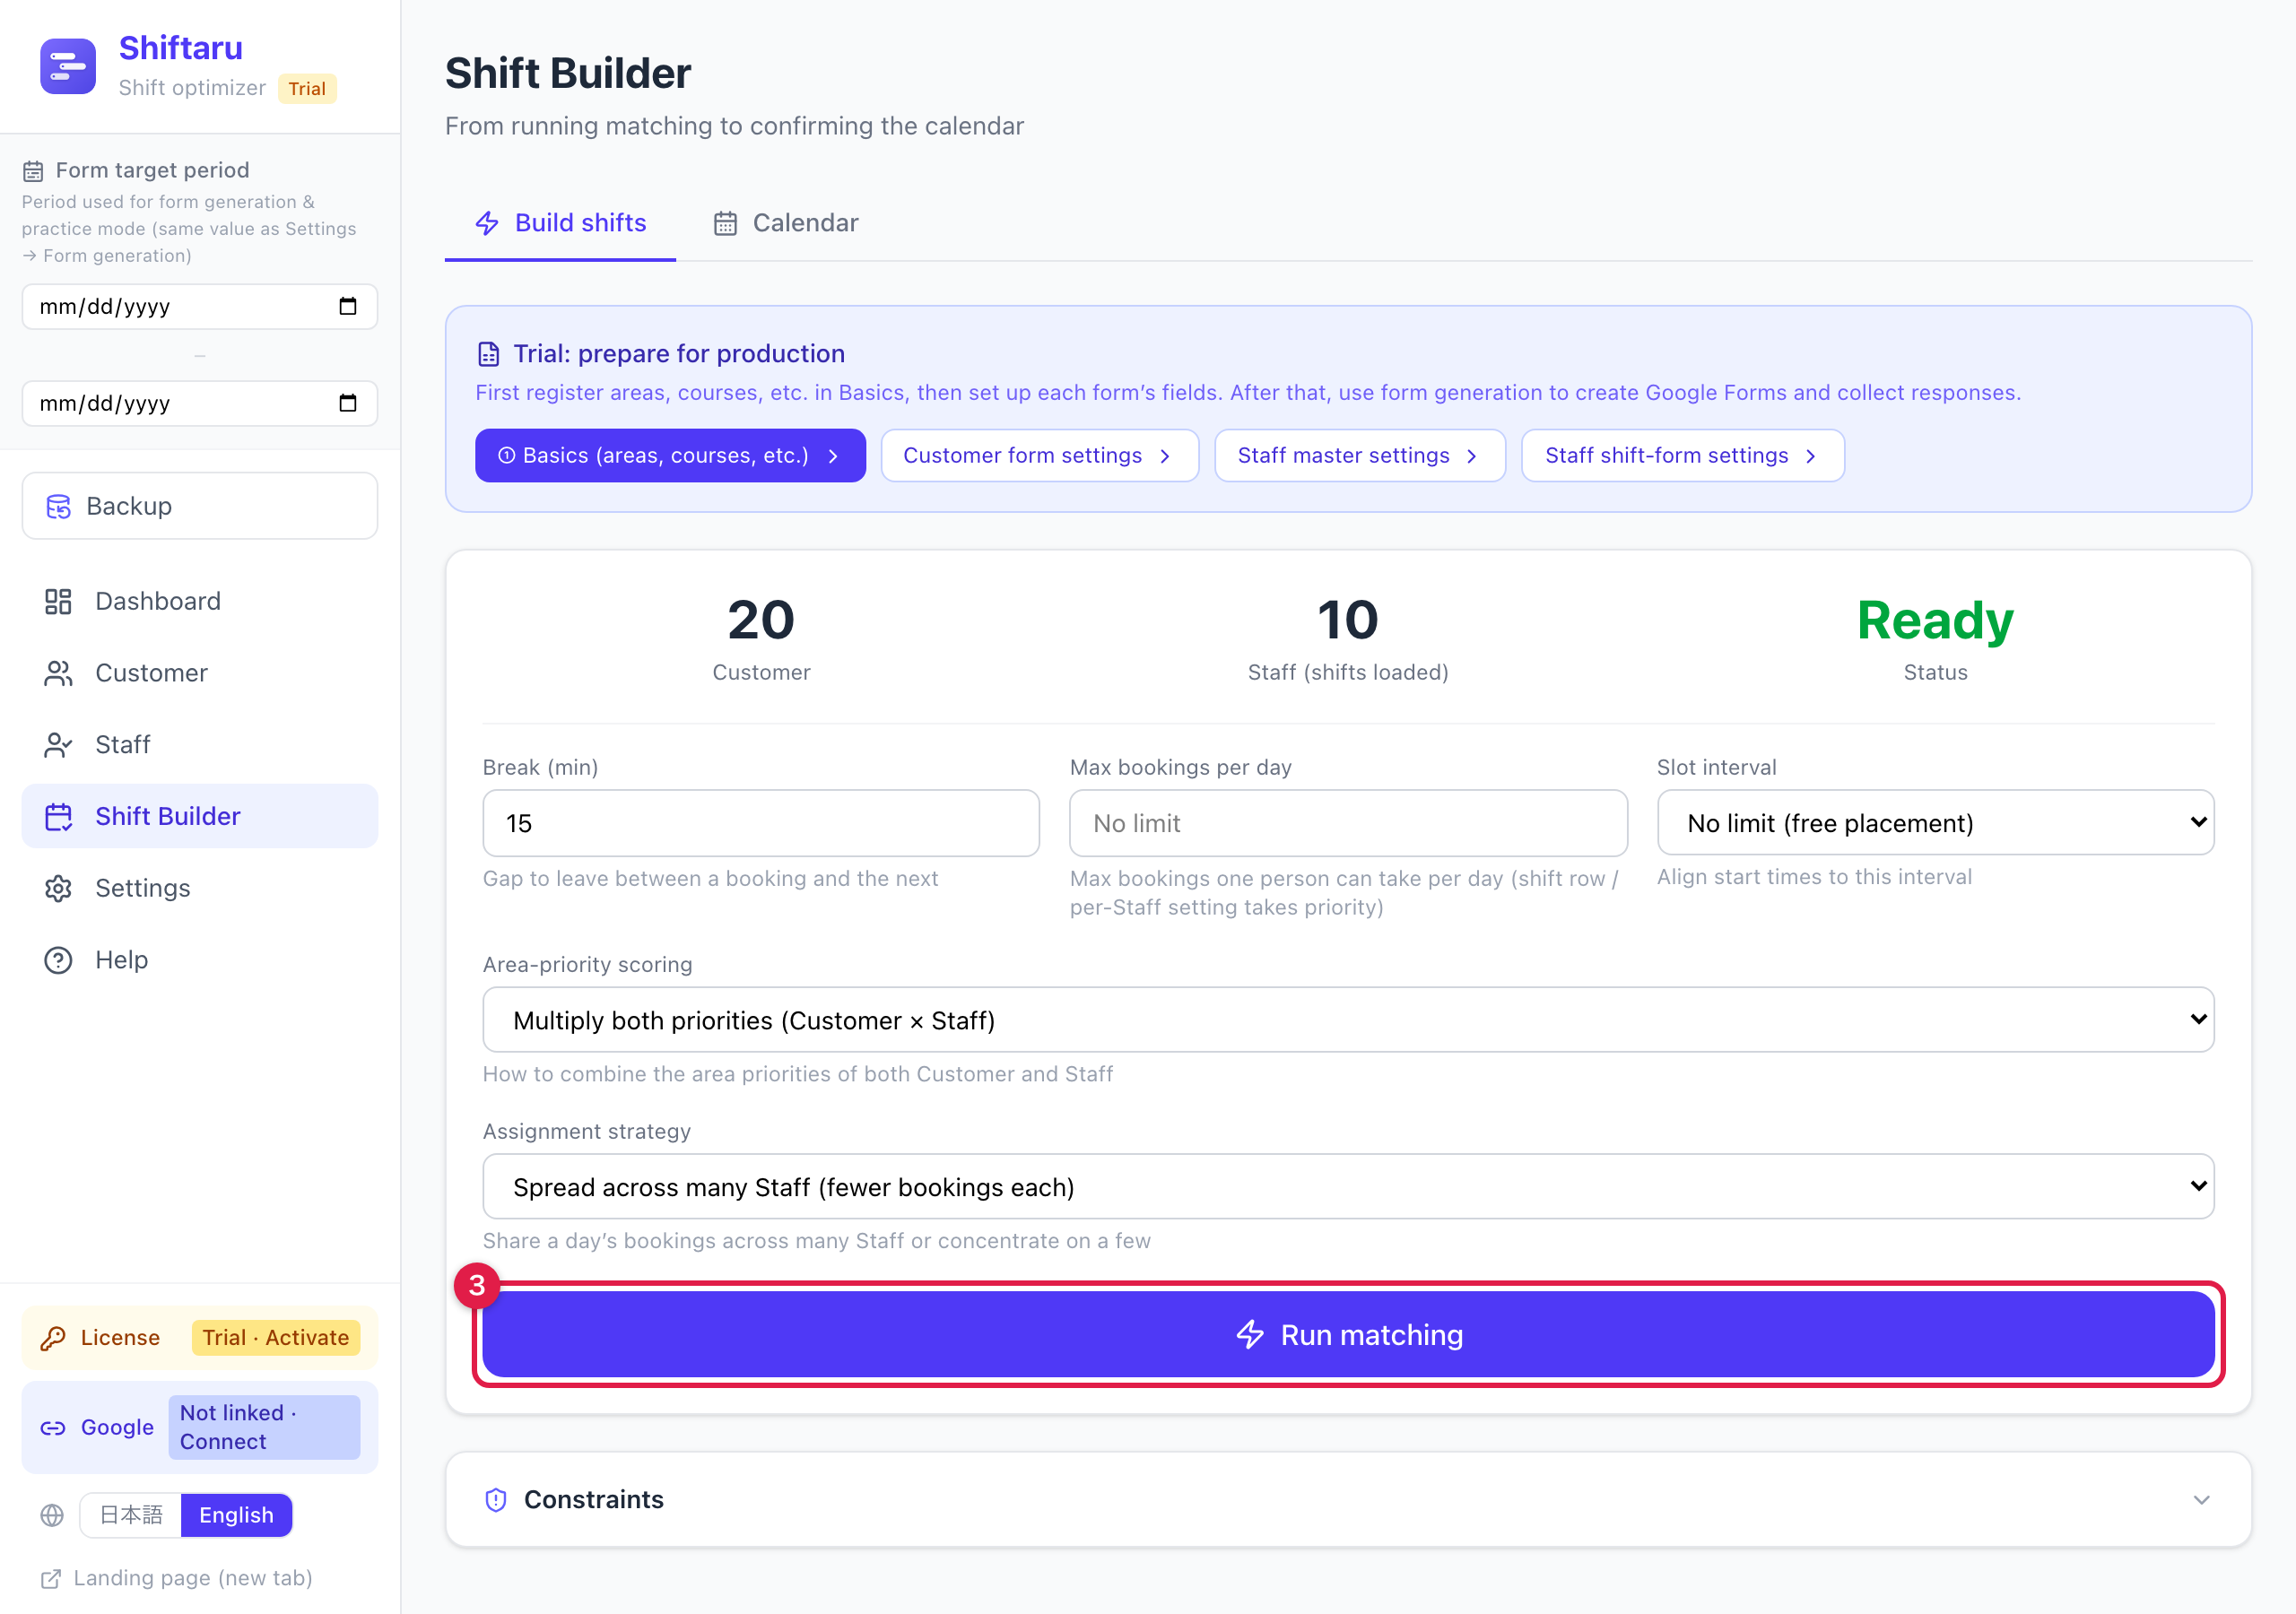
Even a few hundred records finish in seconds.
4. Review the results
Once it runs, you get a results table showing who, when and where.
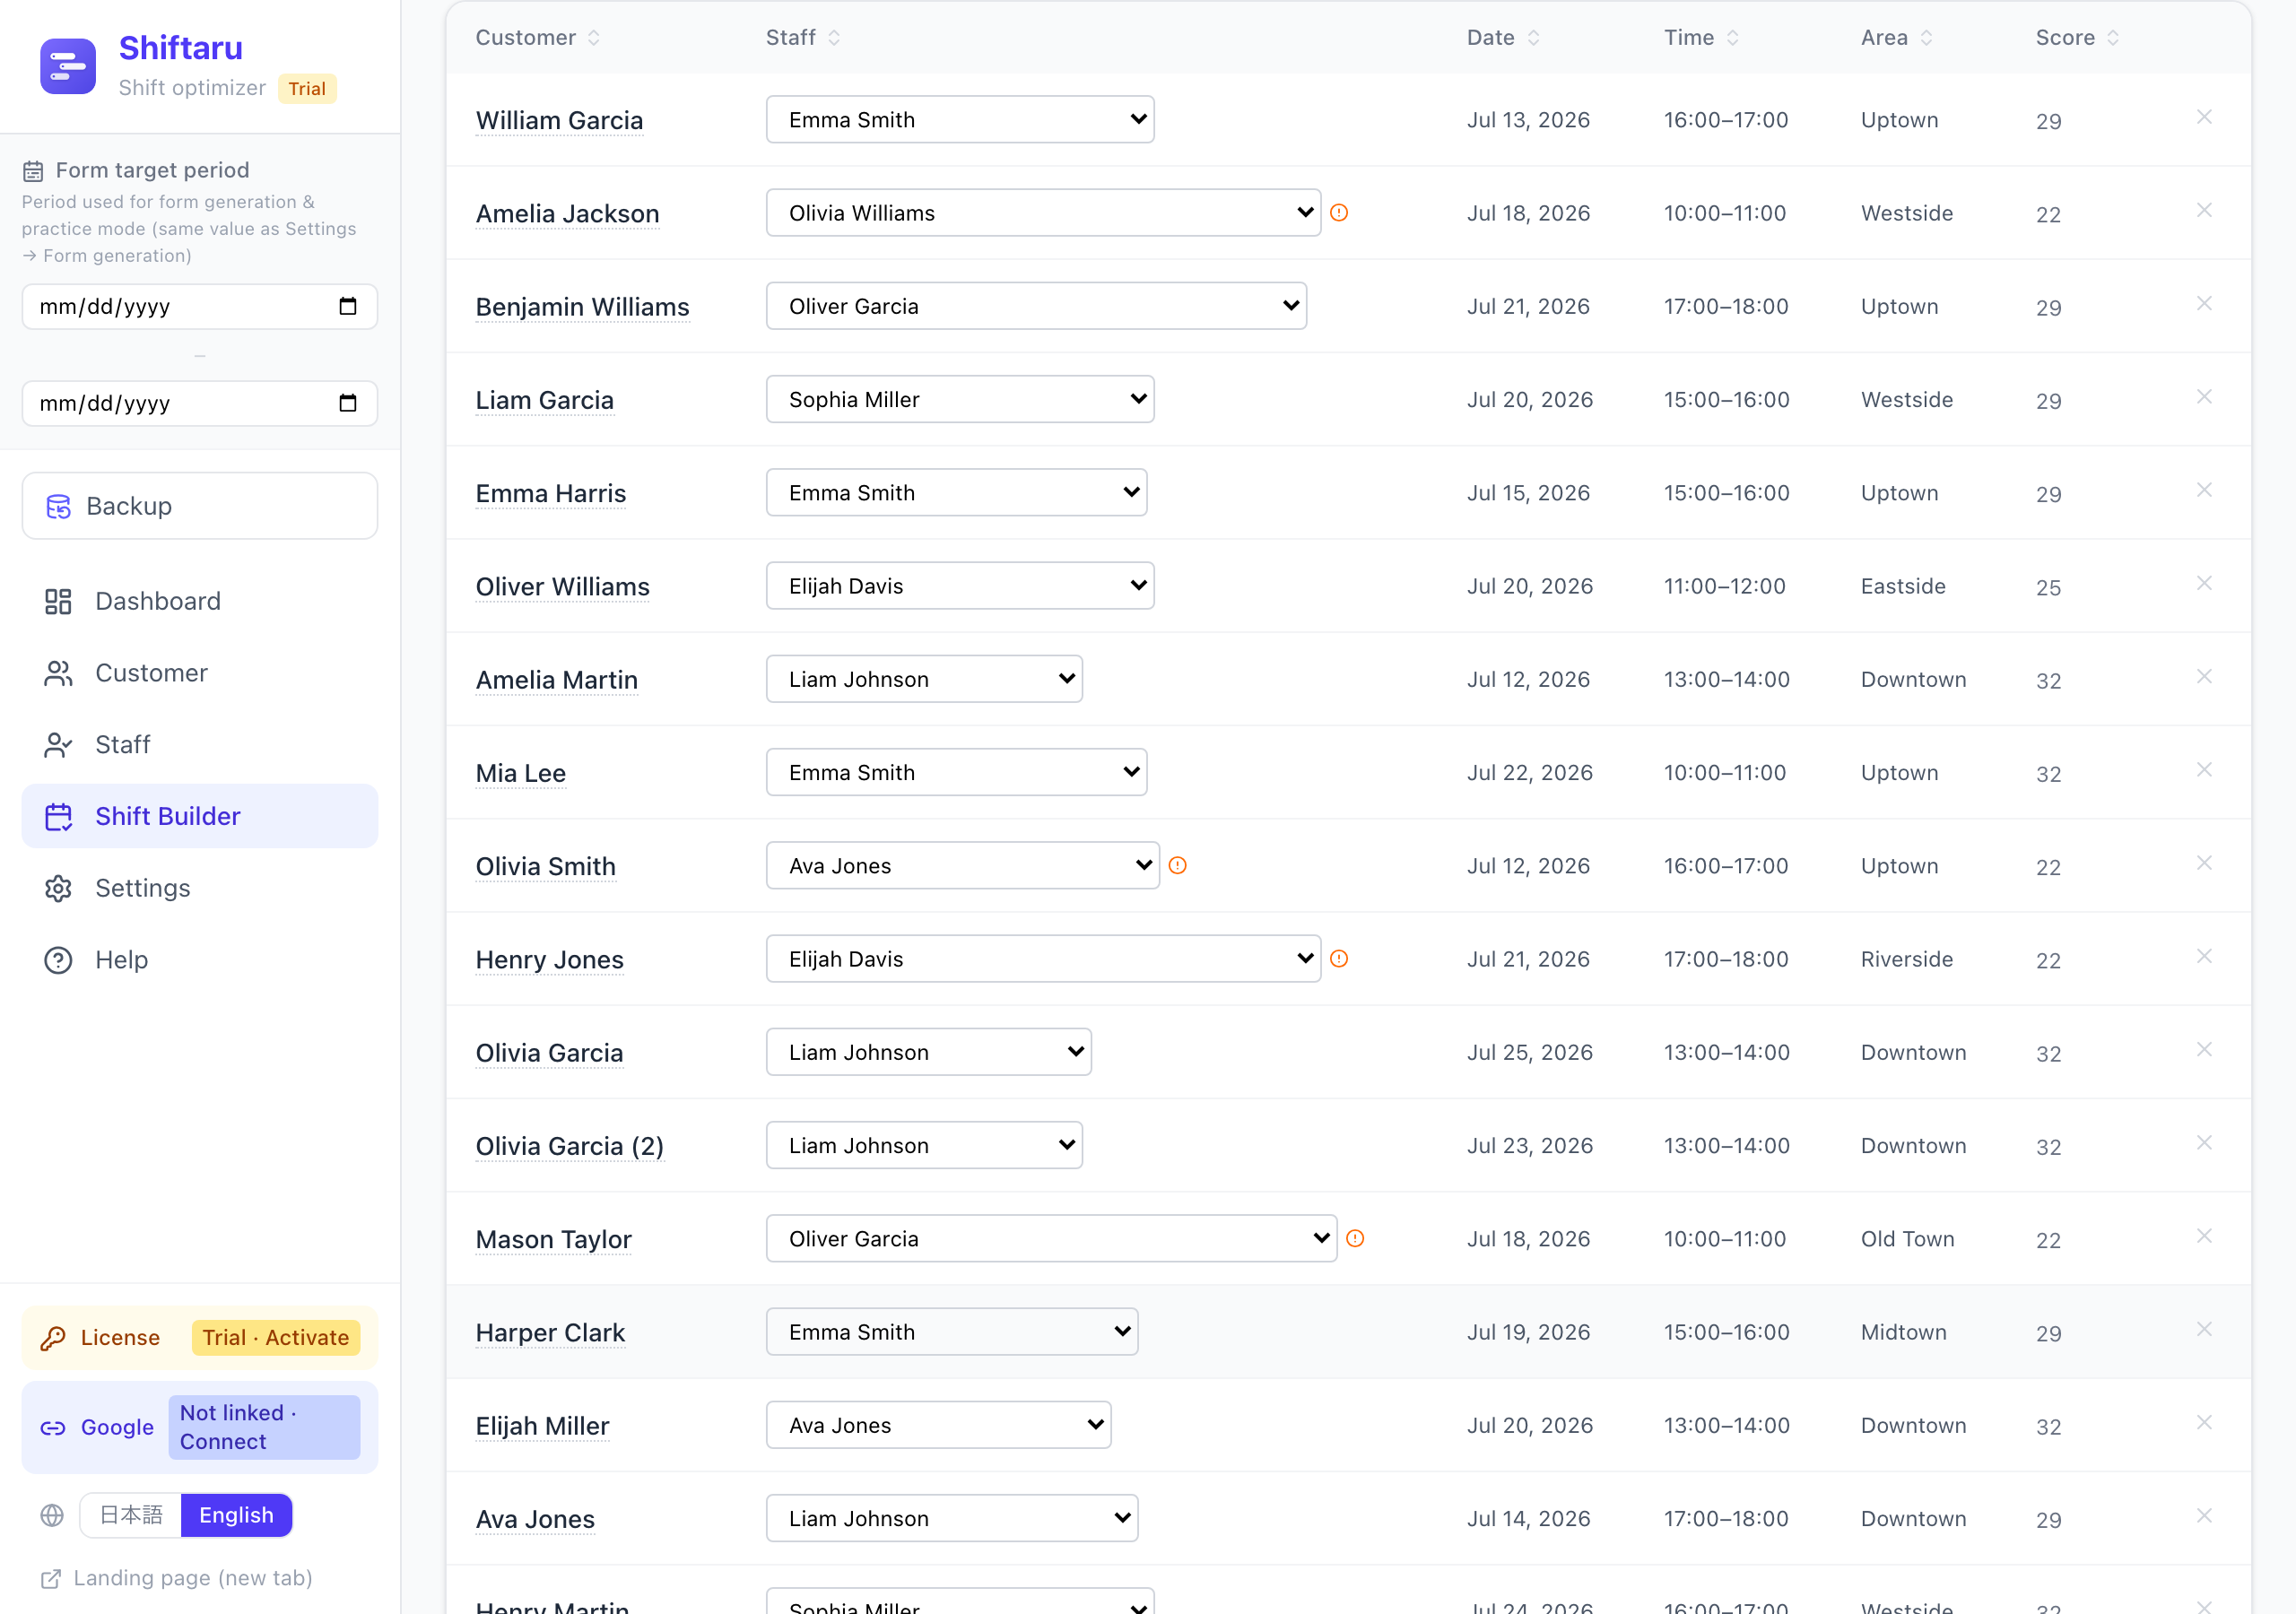
- You can swap the staff member right there from the dropdown. If the person is outside the requested area, has a time problem, or a skill mismatch, a warning icon appears — so you'll notice a change that doesn't actually work.
- For rows that couldn't be matched, "See reasons" shows why (no shift on the day, time mismatch, missing certification, etc.) plus the near-miss candidates.
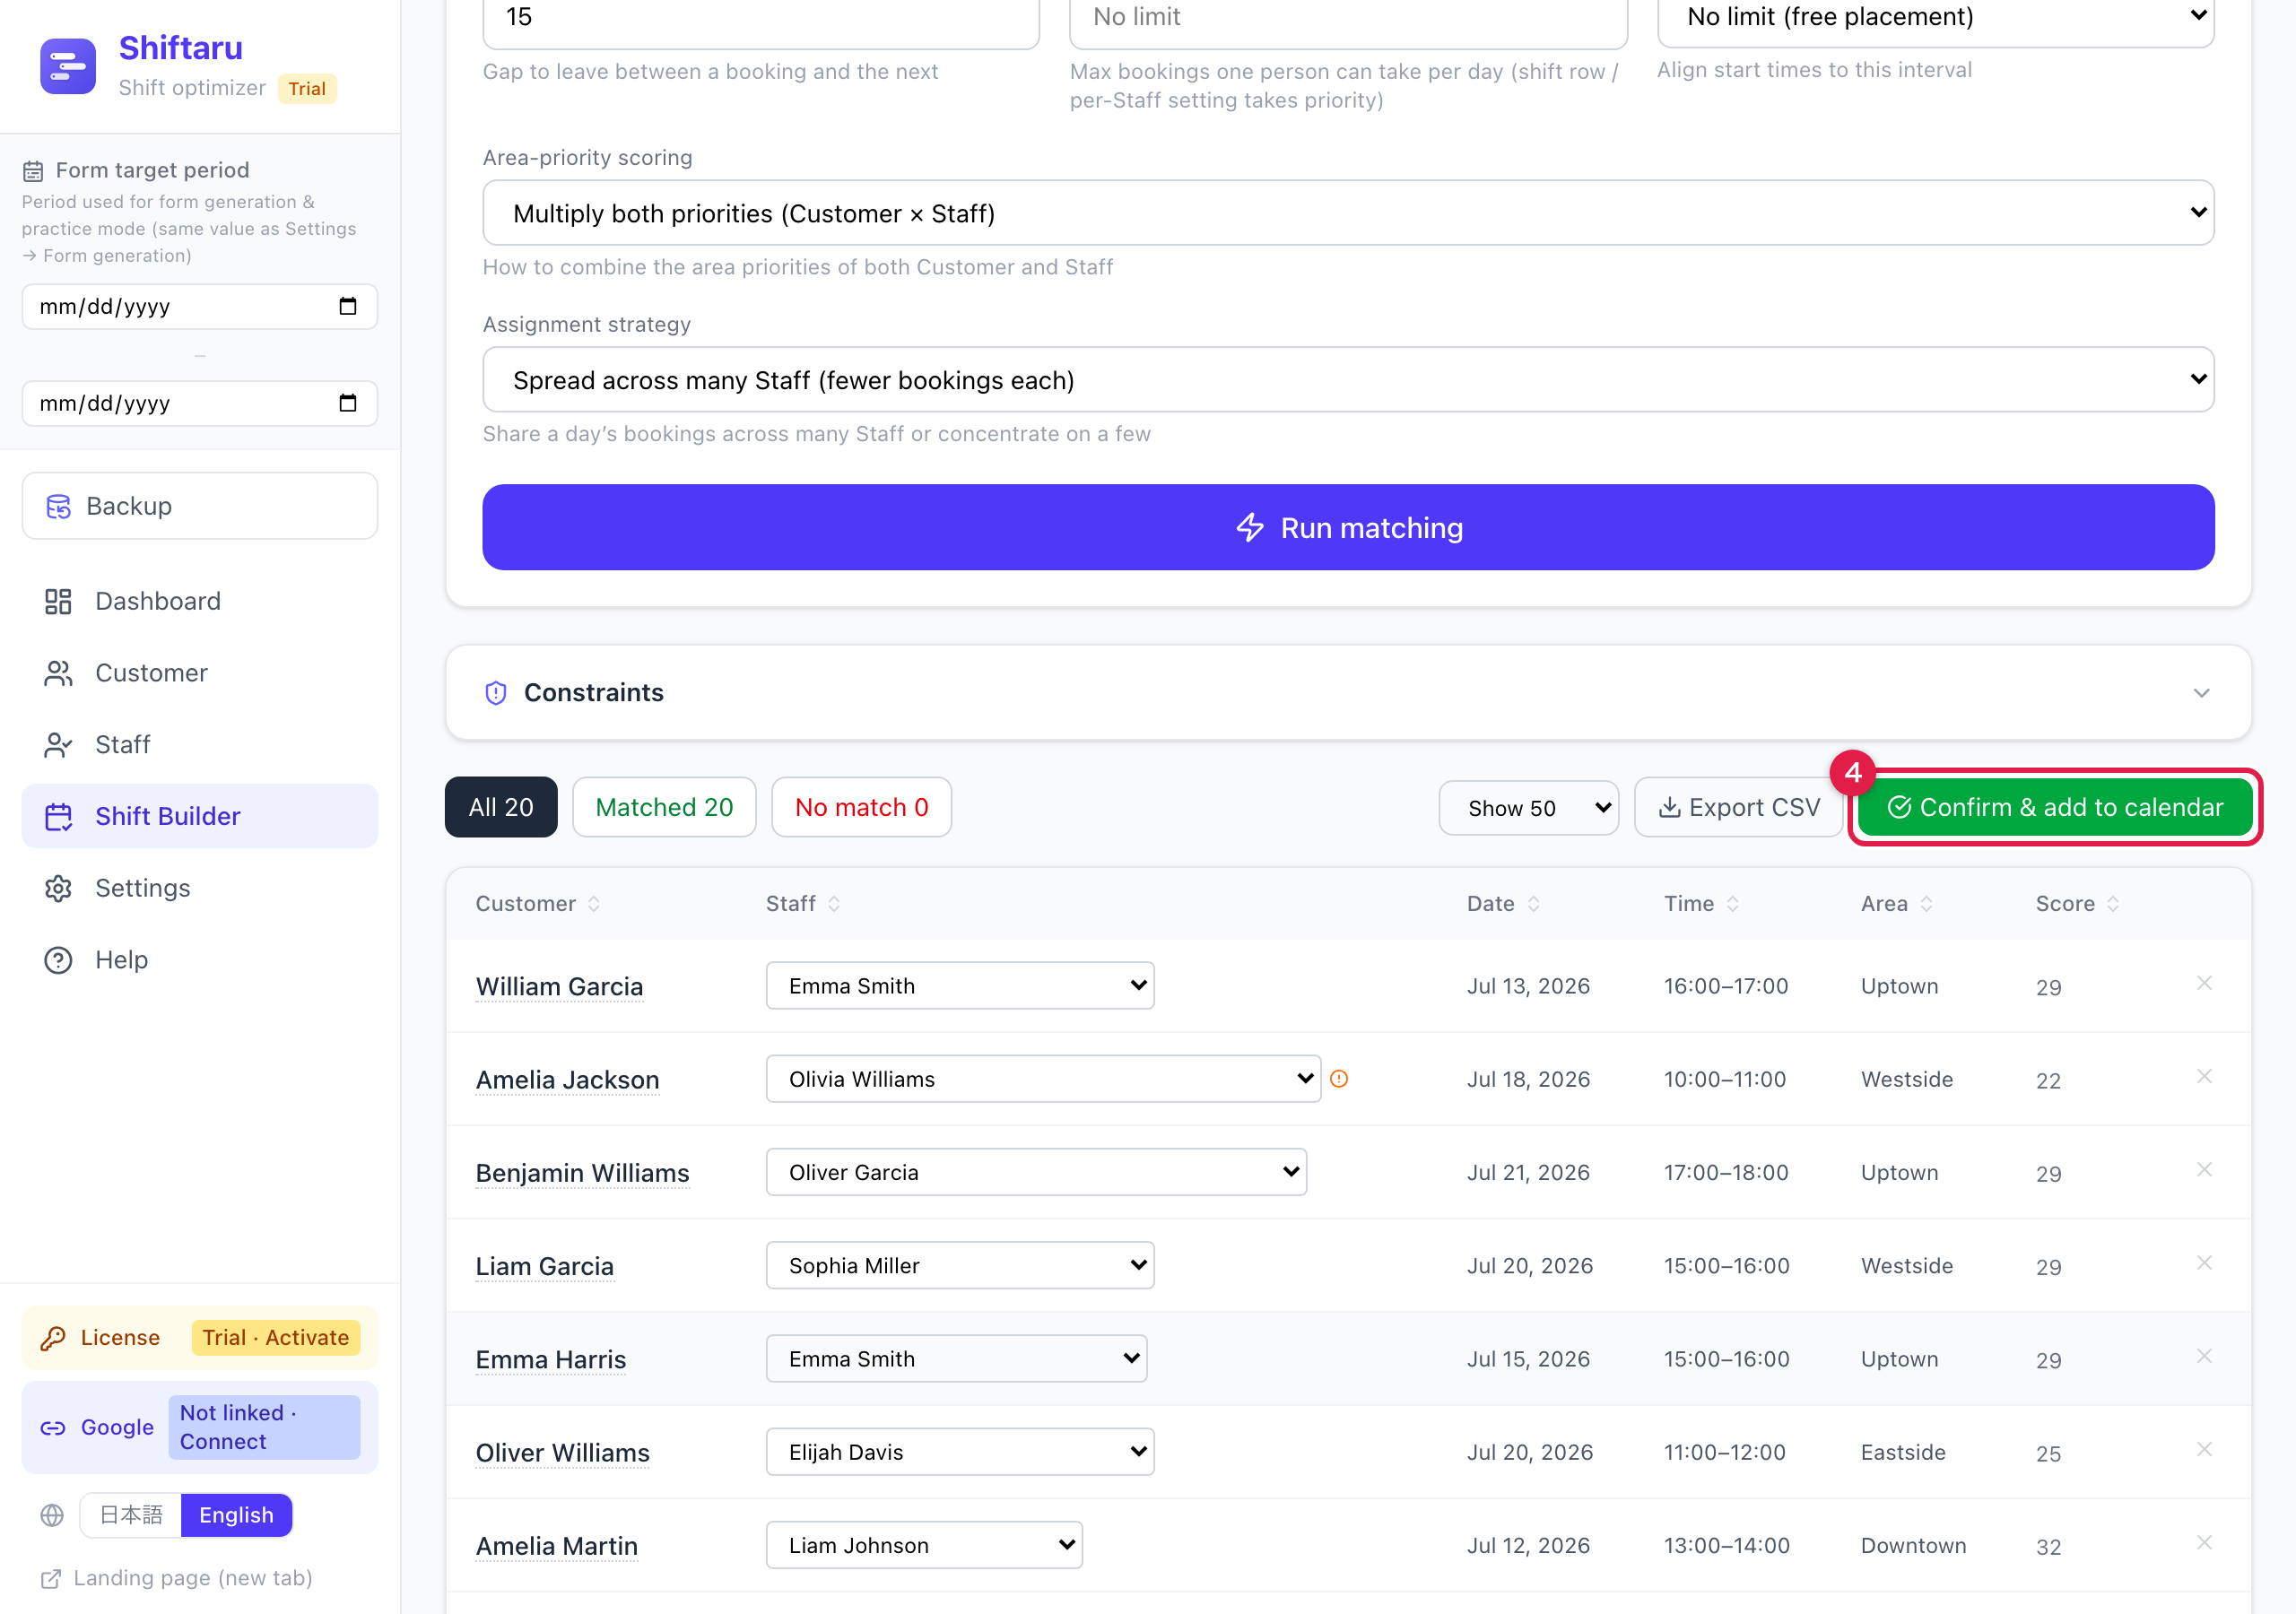
5. Confirm & add to the calendar
If the results look good, press ④ "Confirm & add to calendar".
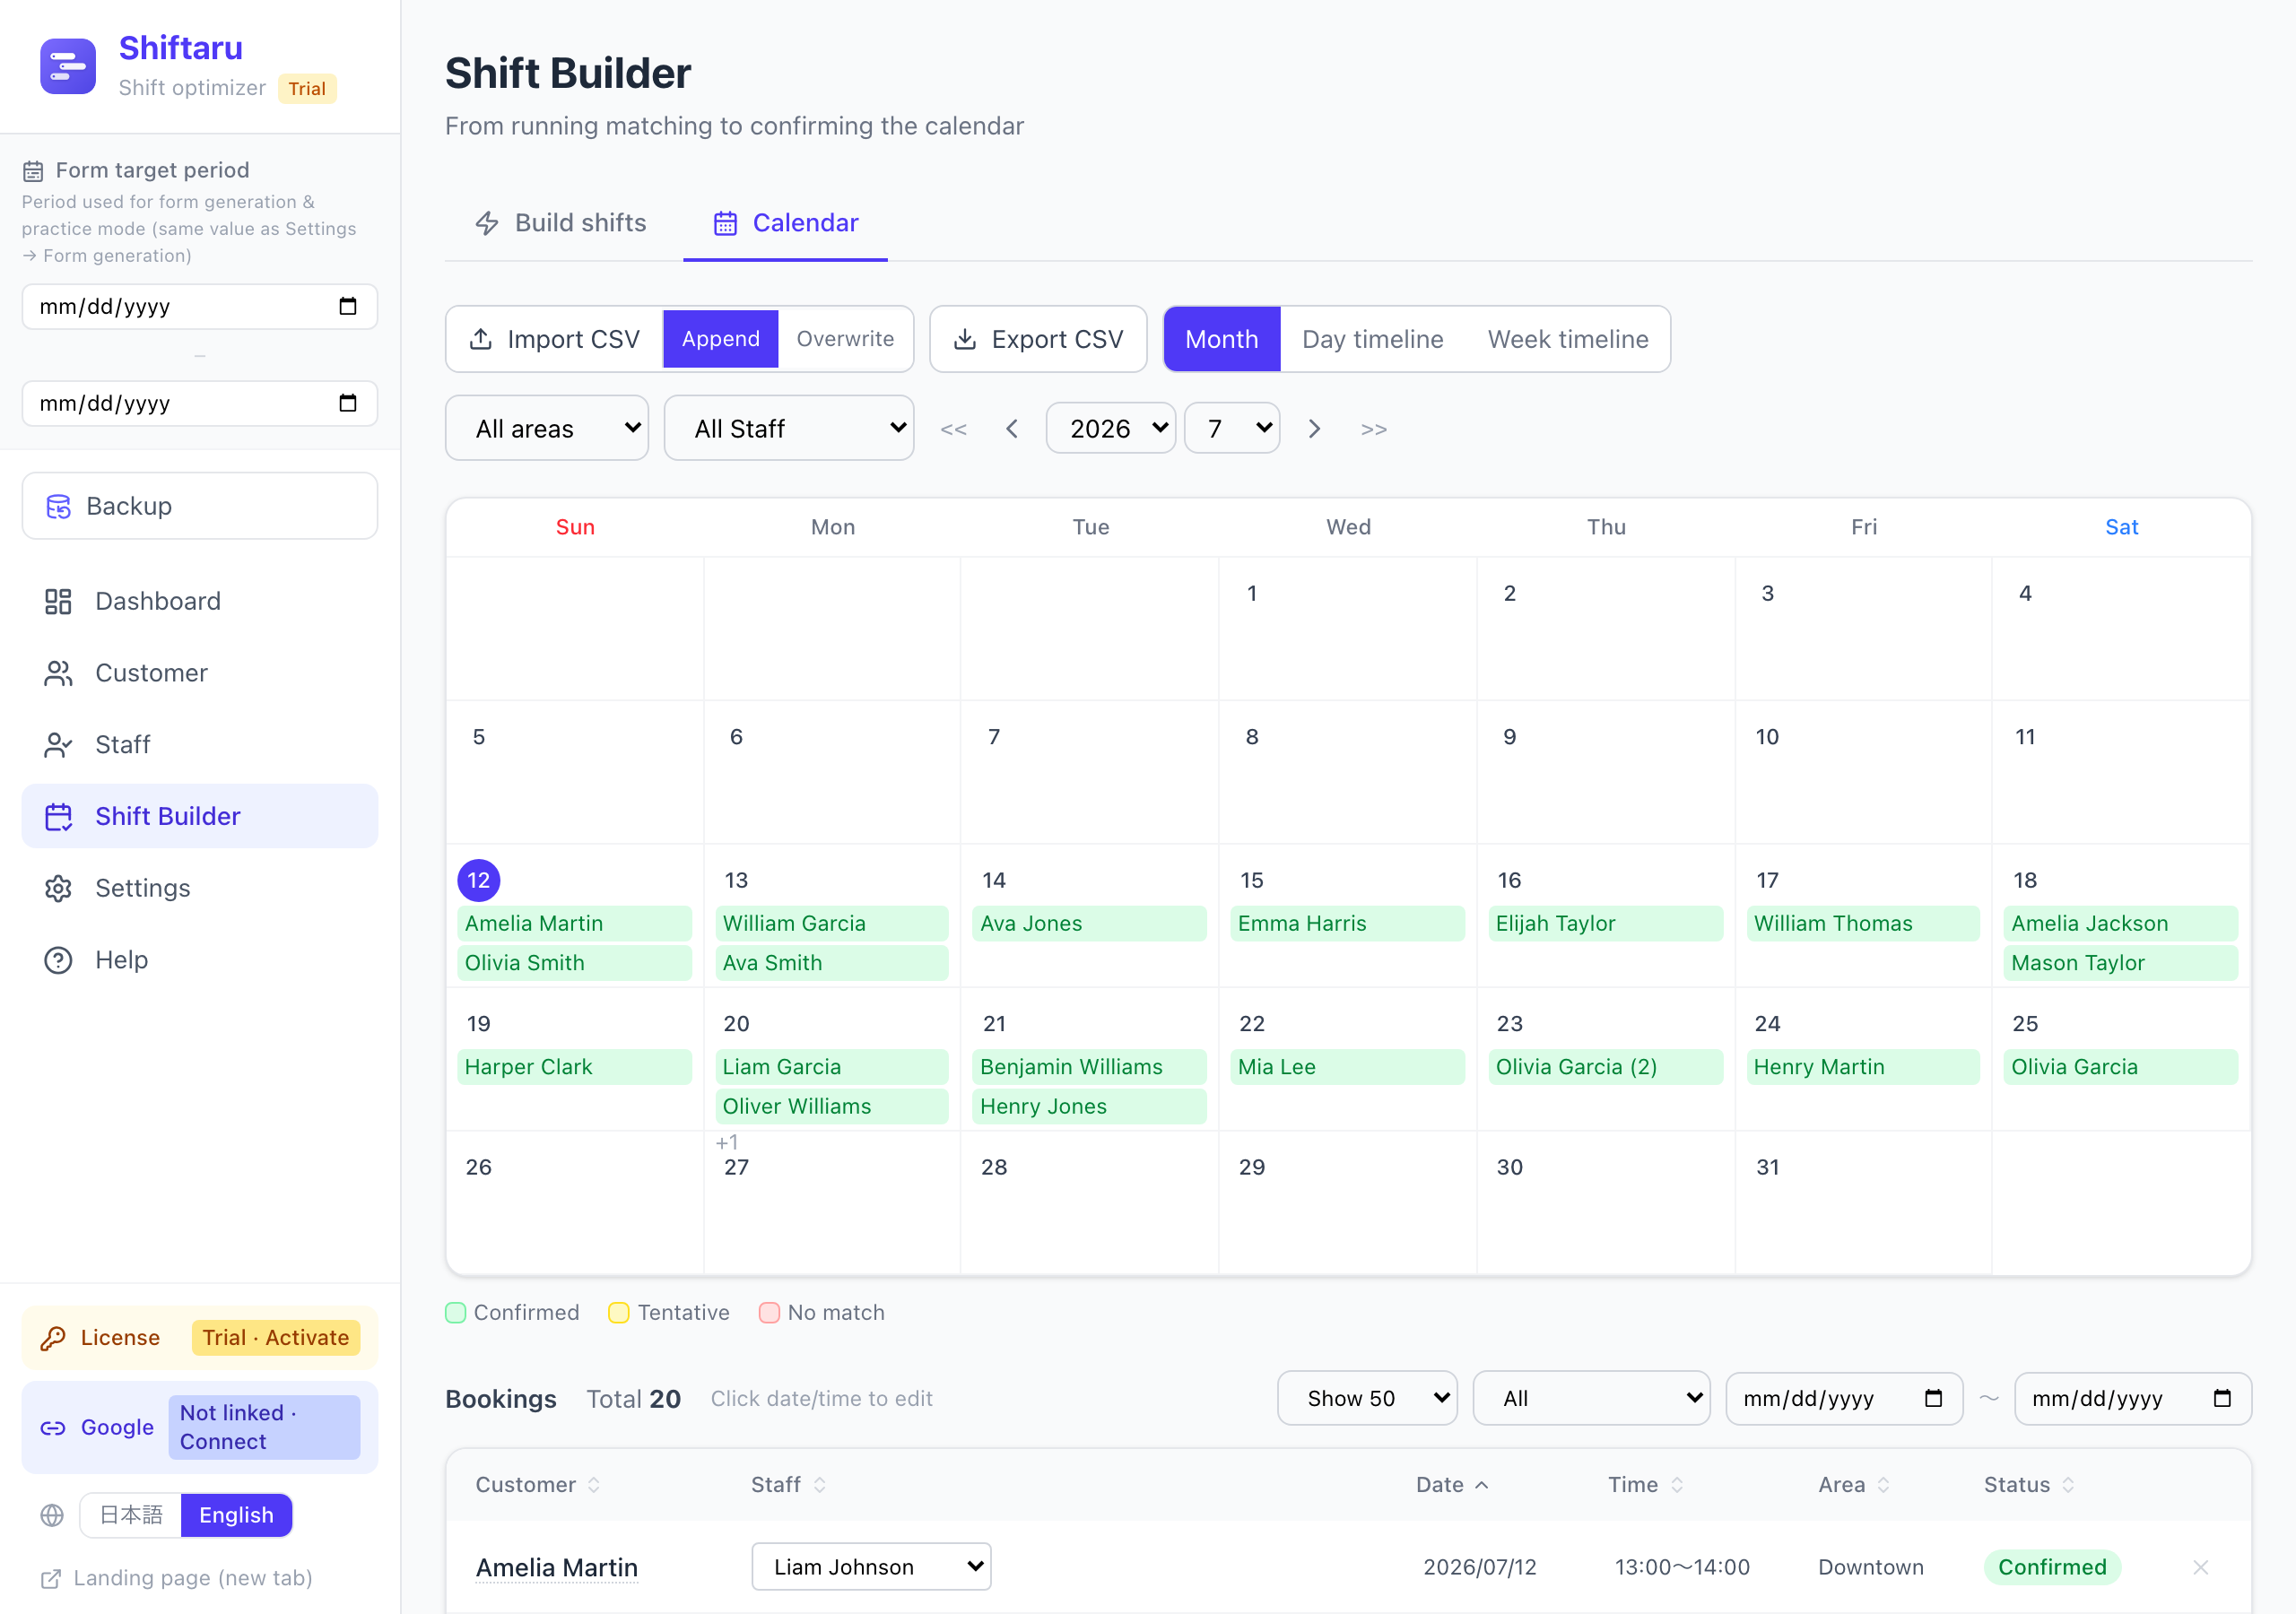
6. See the whole picture on the calendar
Switch to the "Calendar" tab and your confirmed bookings line up in the Month view.
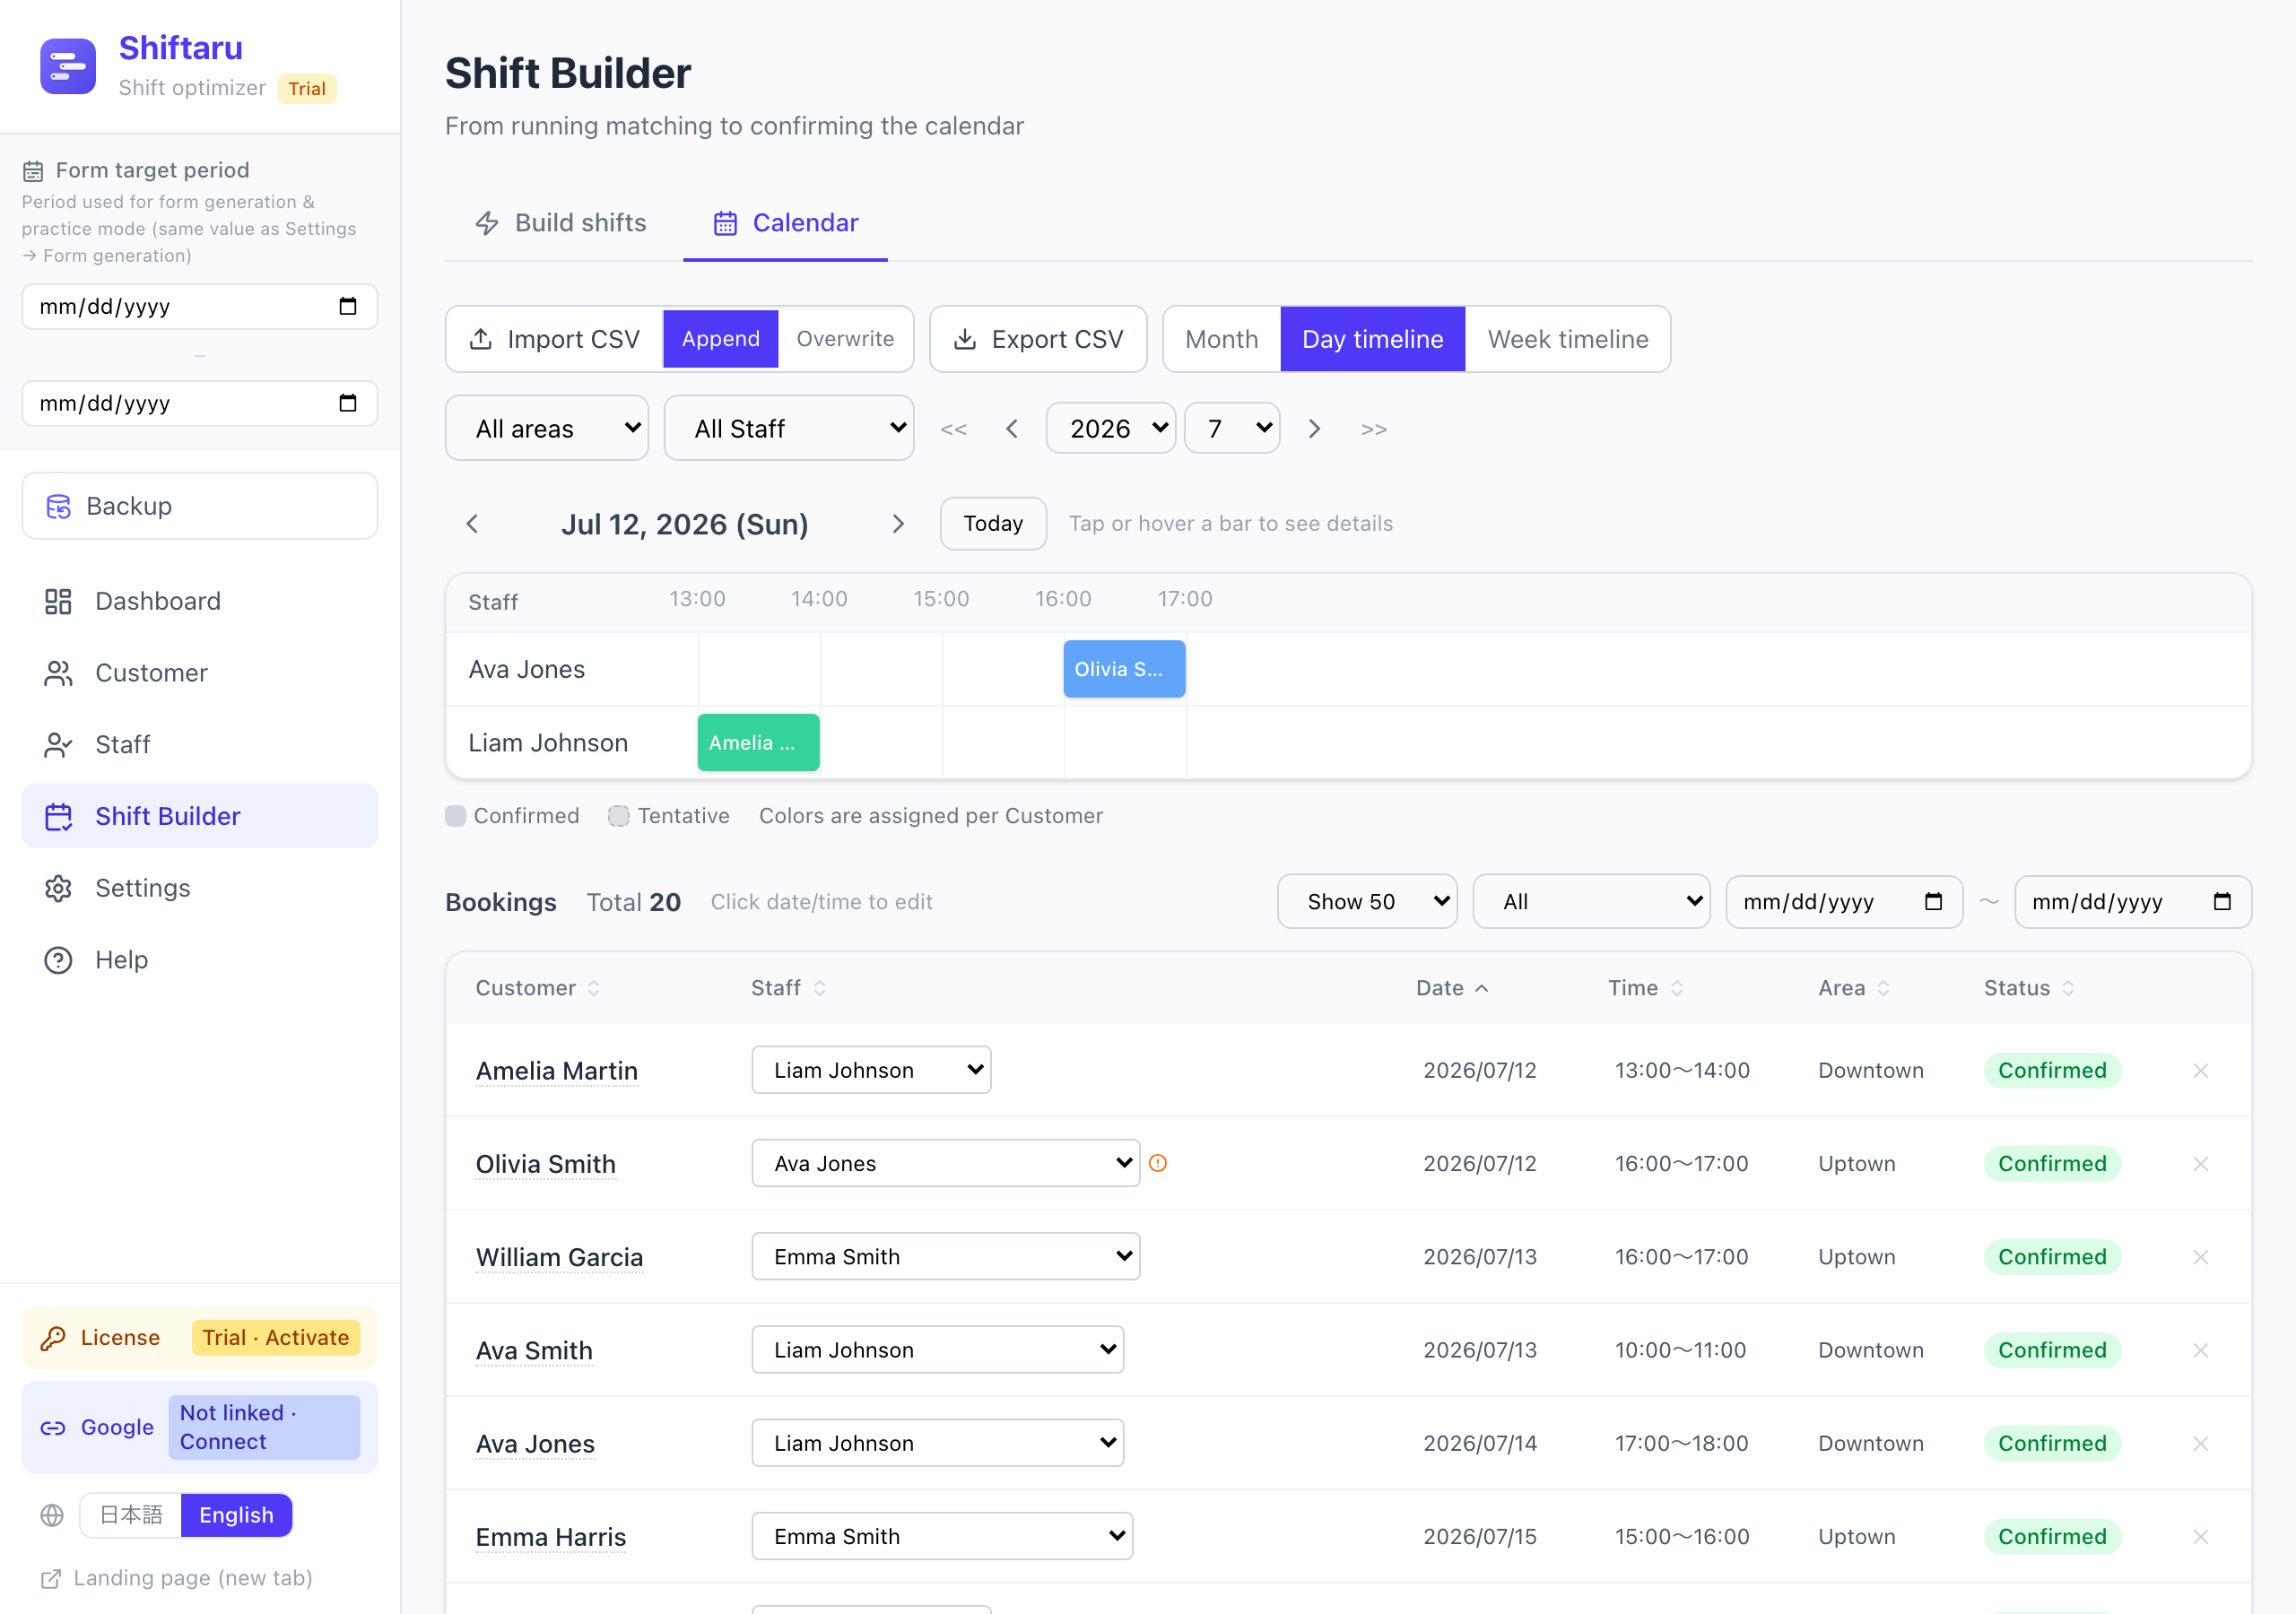
Switch to the "Day timeline" and you get a per-staff Gantt chart — who works when, at a glance.
That's a full round. No signup, free — you can touch every bit of that.
Good to know
- Your data is processed inside your browser only. It is never sent to our servers (more on this design).
- Practice data is cleared when you close the tab (your settings stay). You can reload it as many times as you want.
- Importing real data, CSV/Excel export, and Google Form auto-generation unlock after you buy a license (the trial is "you can see it, but you can't take it out"). See the license guide.
Summary
- Pick your industry (changeable later)
- Set the counts in practice mode and load the samples
- Press "Run matching" — done in seconds
- Review the results (swap staff, read warnings, see reasons for no-matches)
- Confirm and view it on the calendar and timeline
The fastest way to know whether it works for your operation is to try it at your scale.
Take it for a spin.
- ▶ https://shiftaru.com — free practice mode, no signup
- ▶ Read more: Shiftaru Blog